One Room Challenge - Week 6

I’m going to be honest. I’m at that spot in my project where my brain tells me I have more than enough time to finish this project, but my gut is telling me my brain is just a lyin’, cheatin’, sonofabitch. I get this feeling whenever there is a deadline involved, whether it be preparing a meal for guests, working on renovations, heading to an appointment, studying for a test, ANTHING! Then, I’m paralyzed. Fact: My gut is right more often than my brain. Since I’m layin’ it all out there, it’s around this point in any project when all other parts of my life start falling through the cracks. Meals are late. The house is a disaster. I’m going to sleep toooooo late. Maybe I write this to convince my brain to listen to my gut, this time? Maybe I don’t listen to either and just *do* one day at a time? Yeah… I think that’s what I’ll do. So what did I *do* this week?
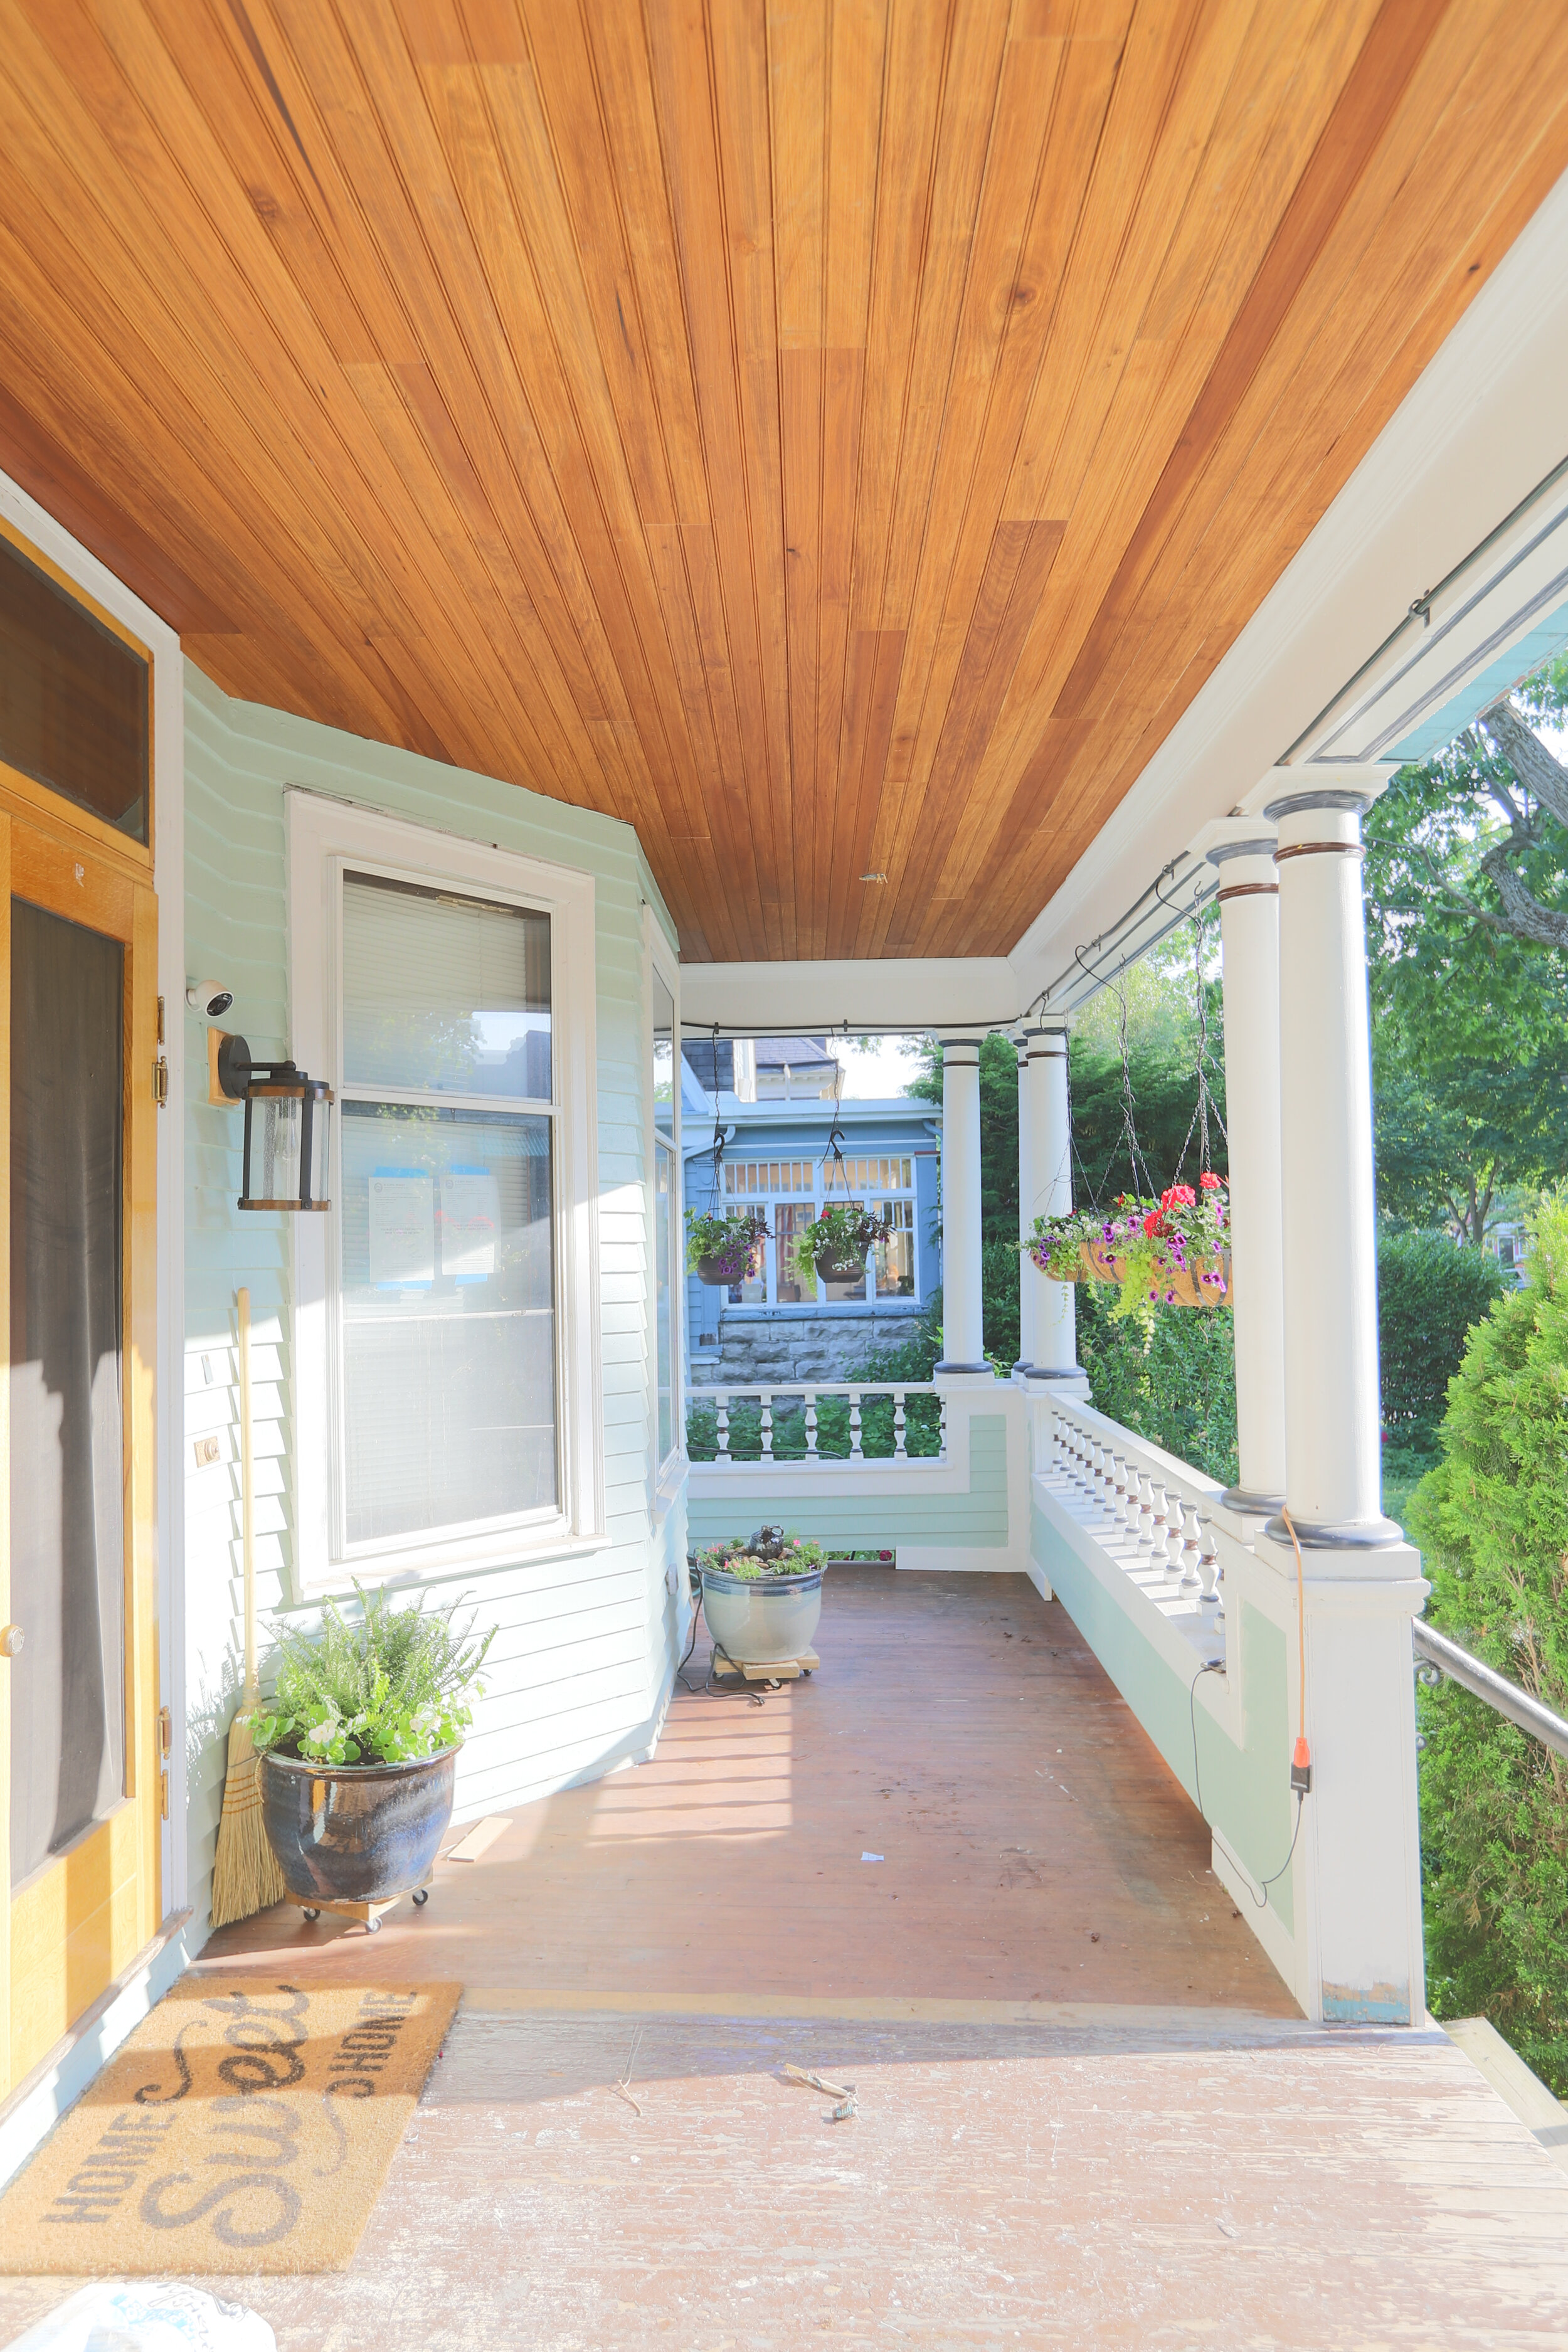
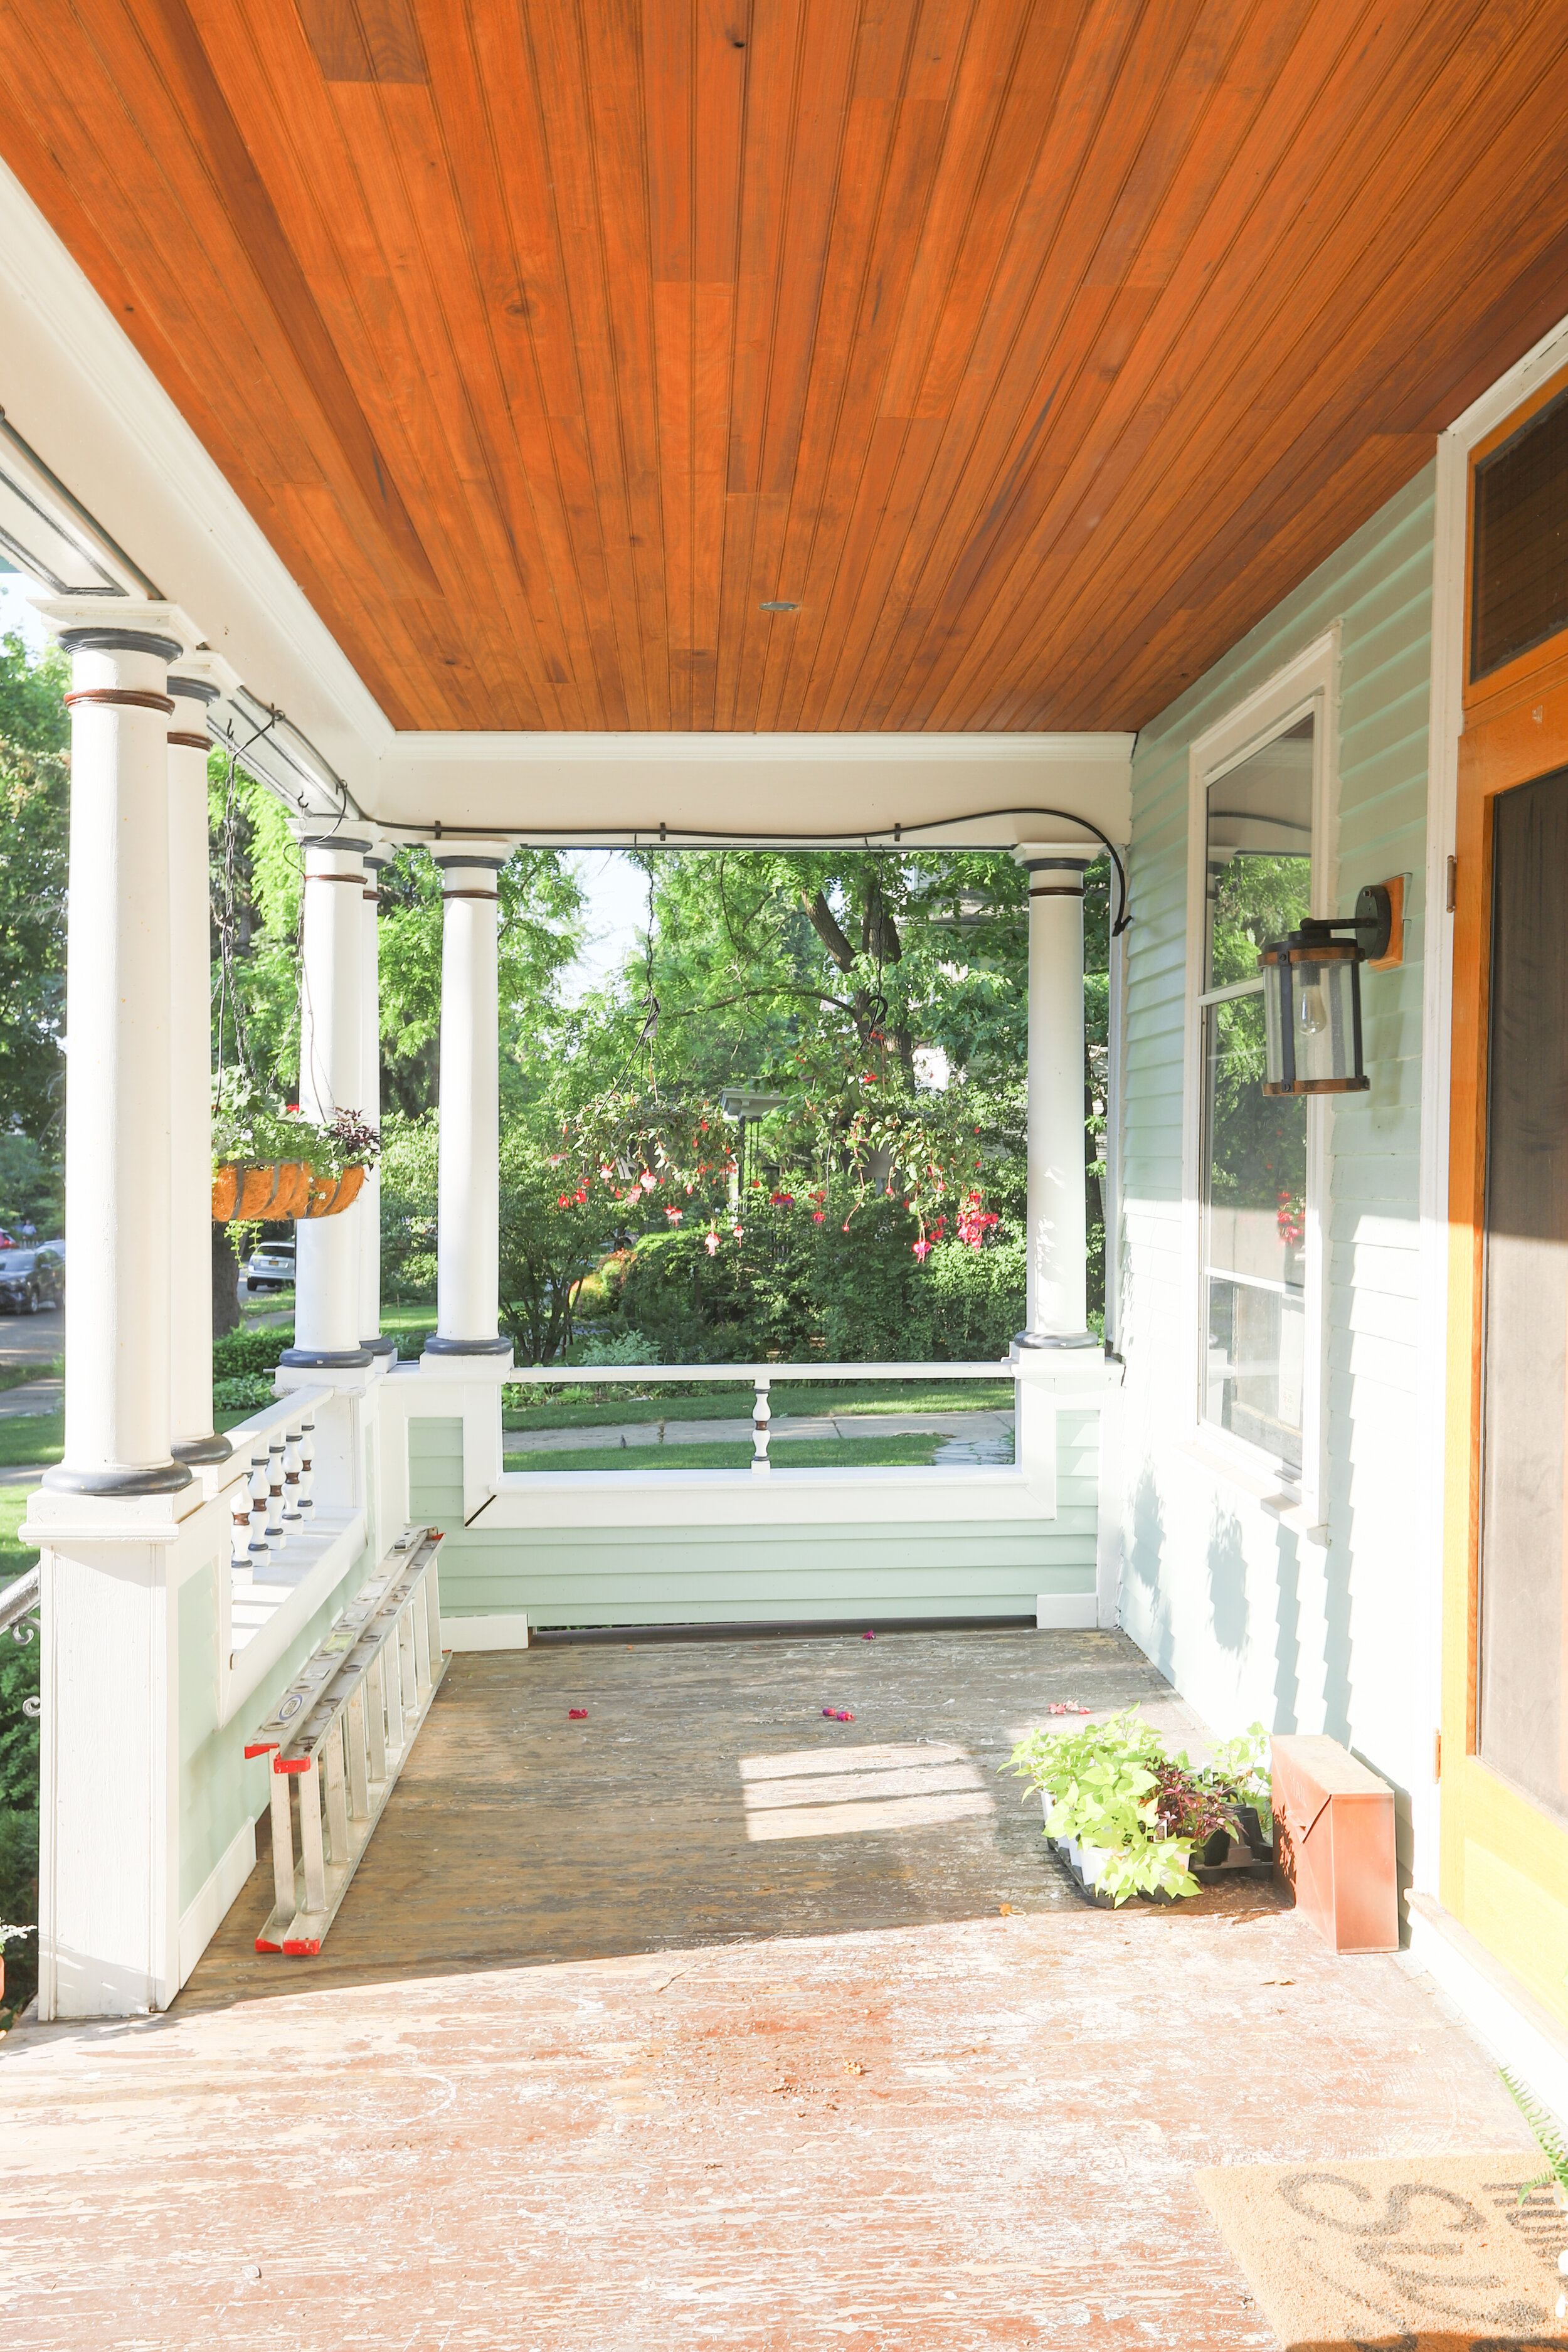
1) Primed and painted the trim.
2) Painted the siding.
Aaaannndddd… Oh, yeah, right, 3) I built this…

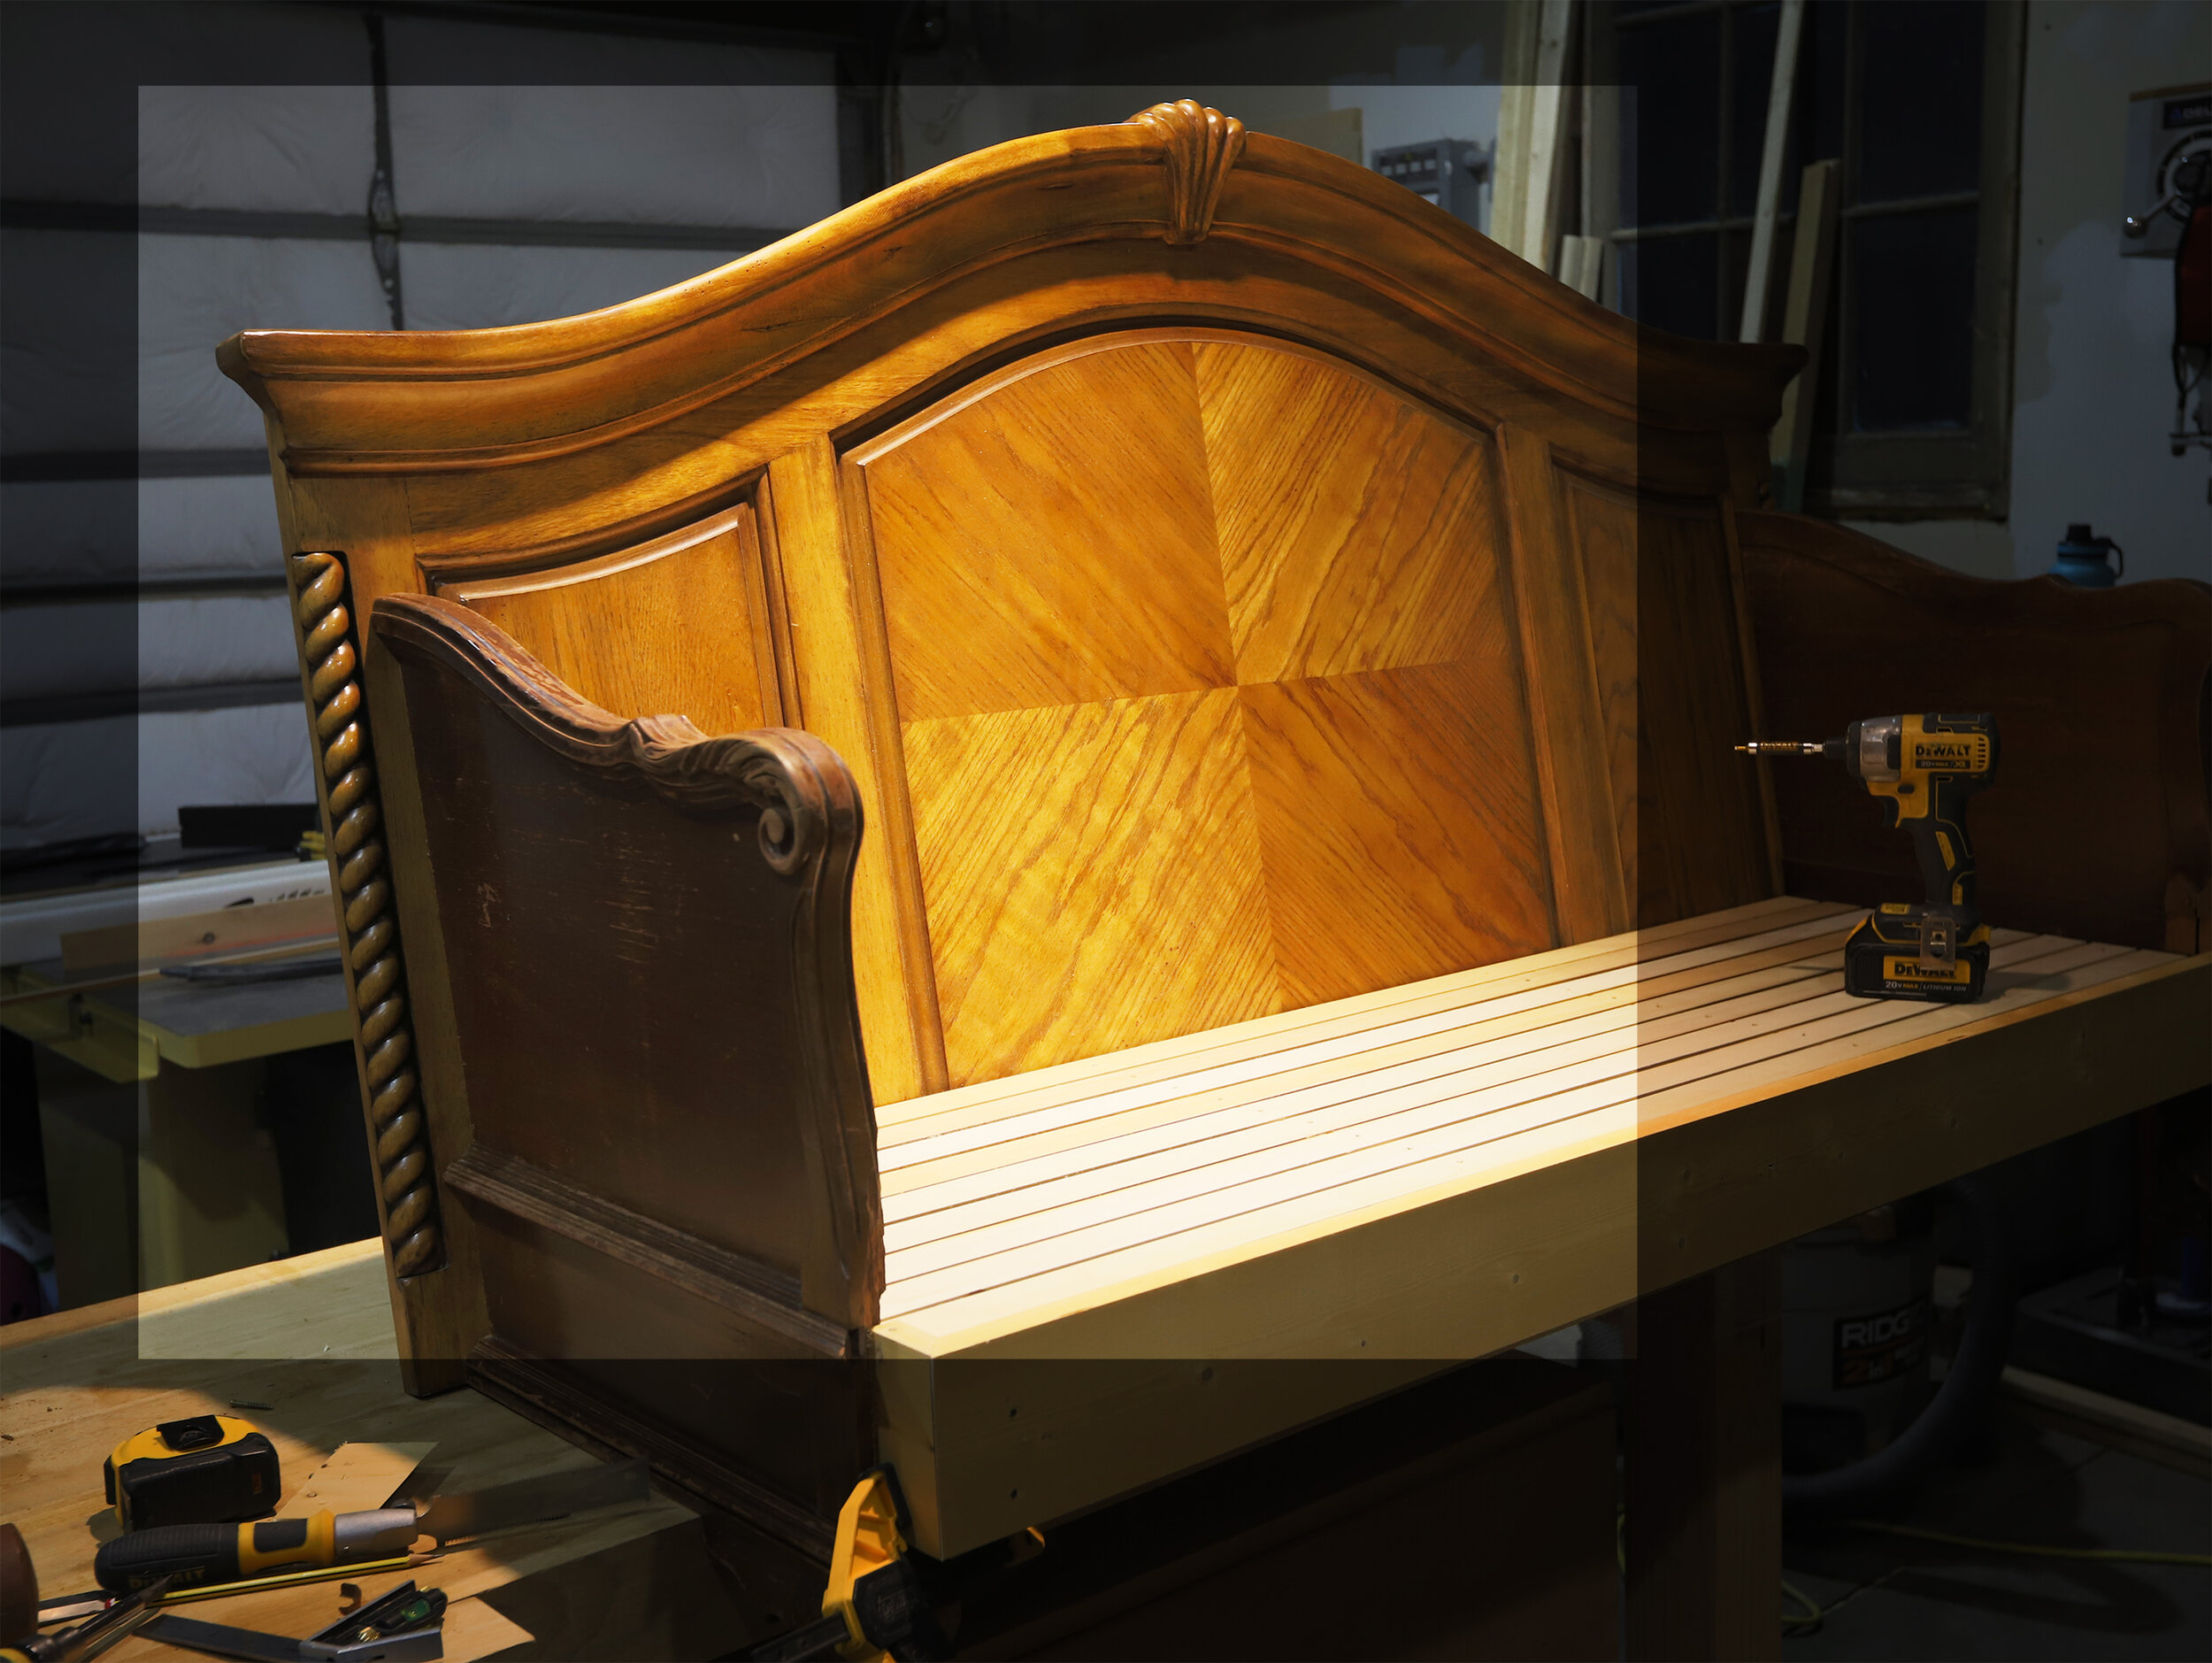
It is as glorious as the heavenly lighting in our garage makes it appear!
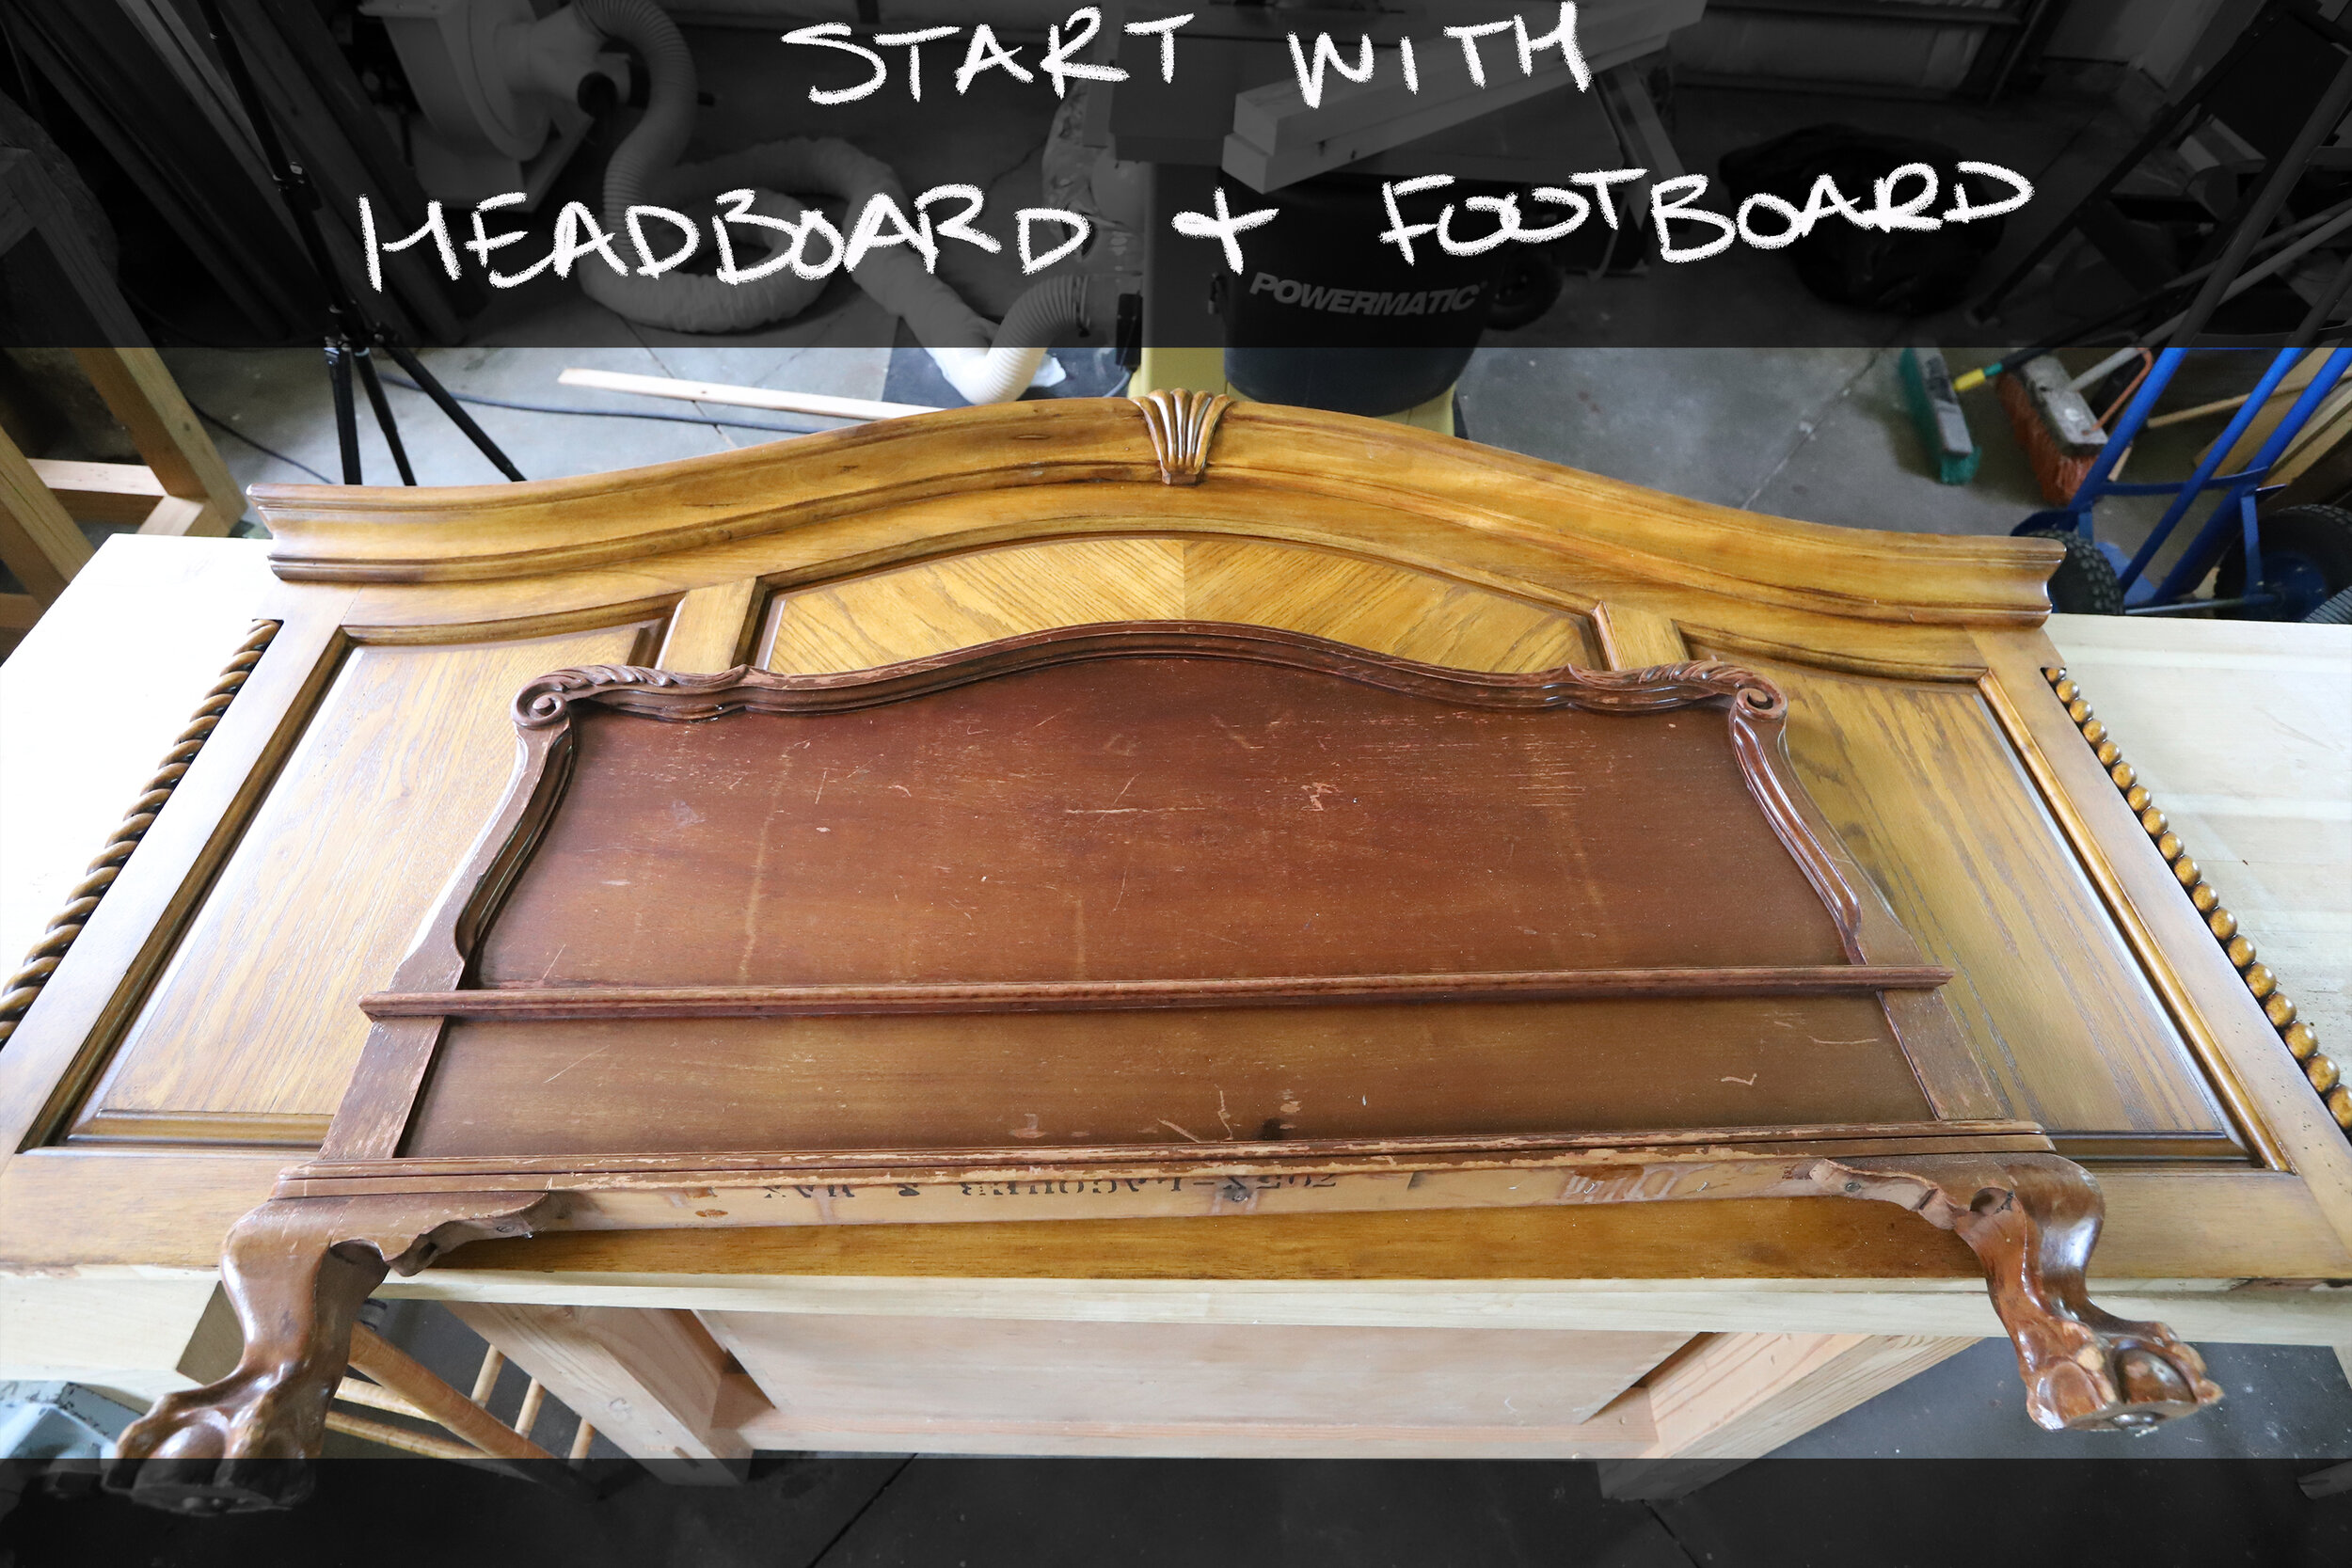
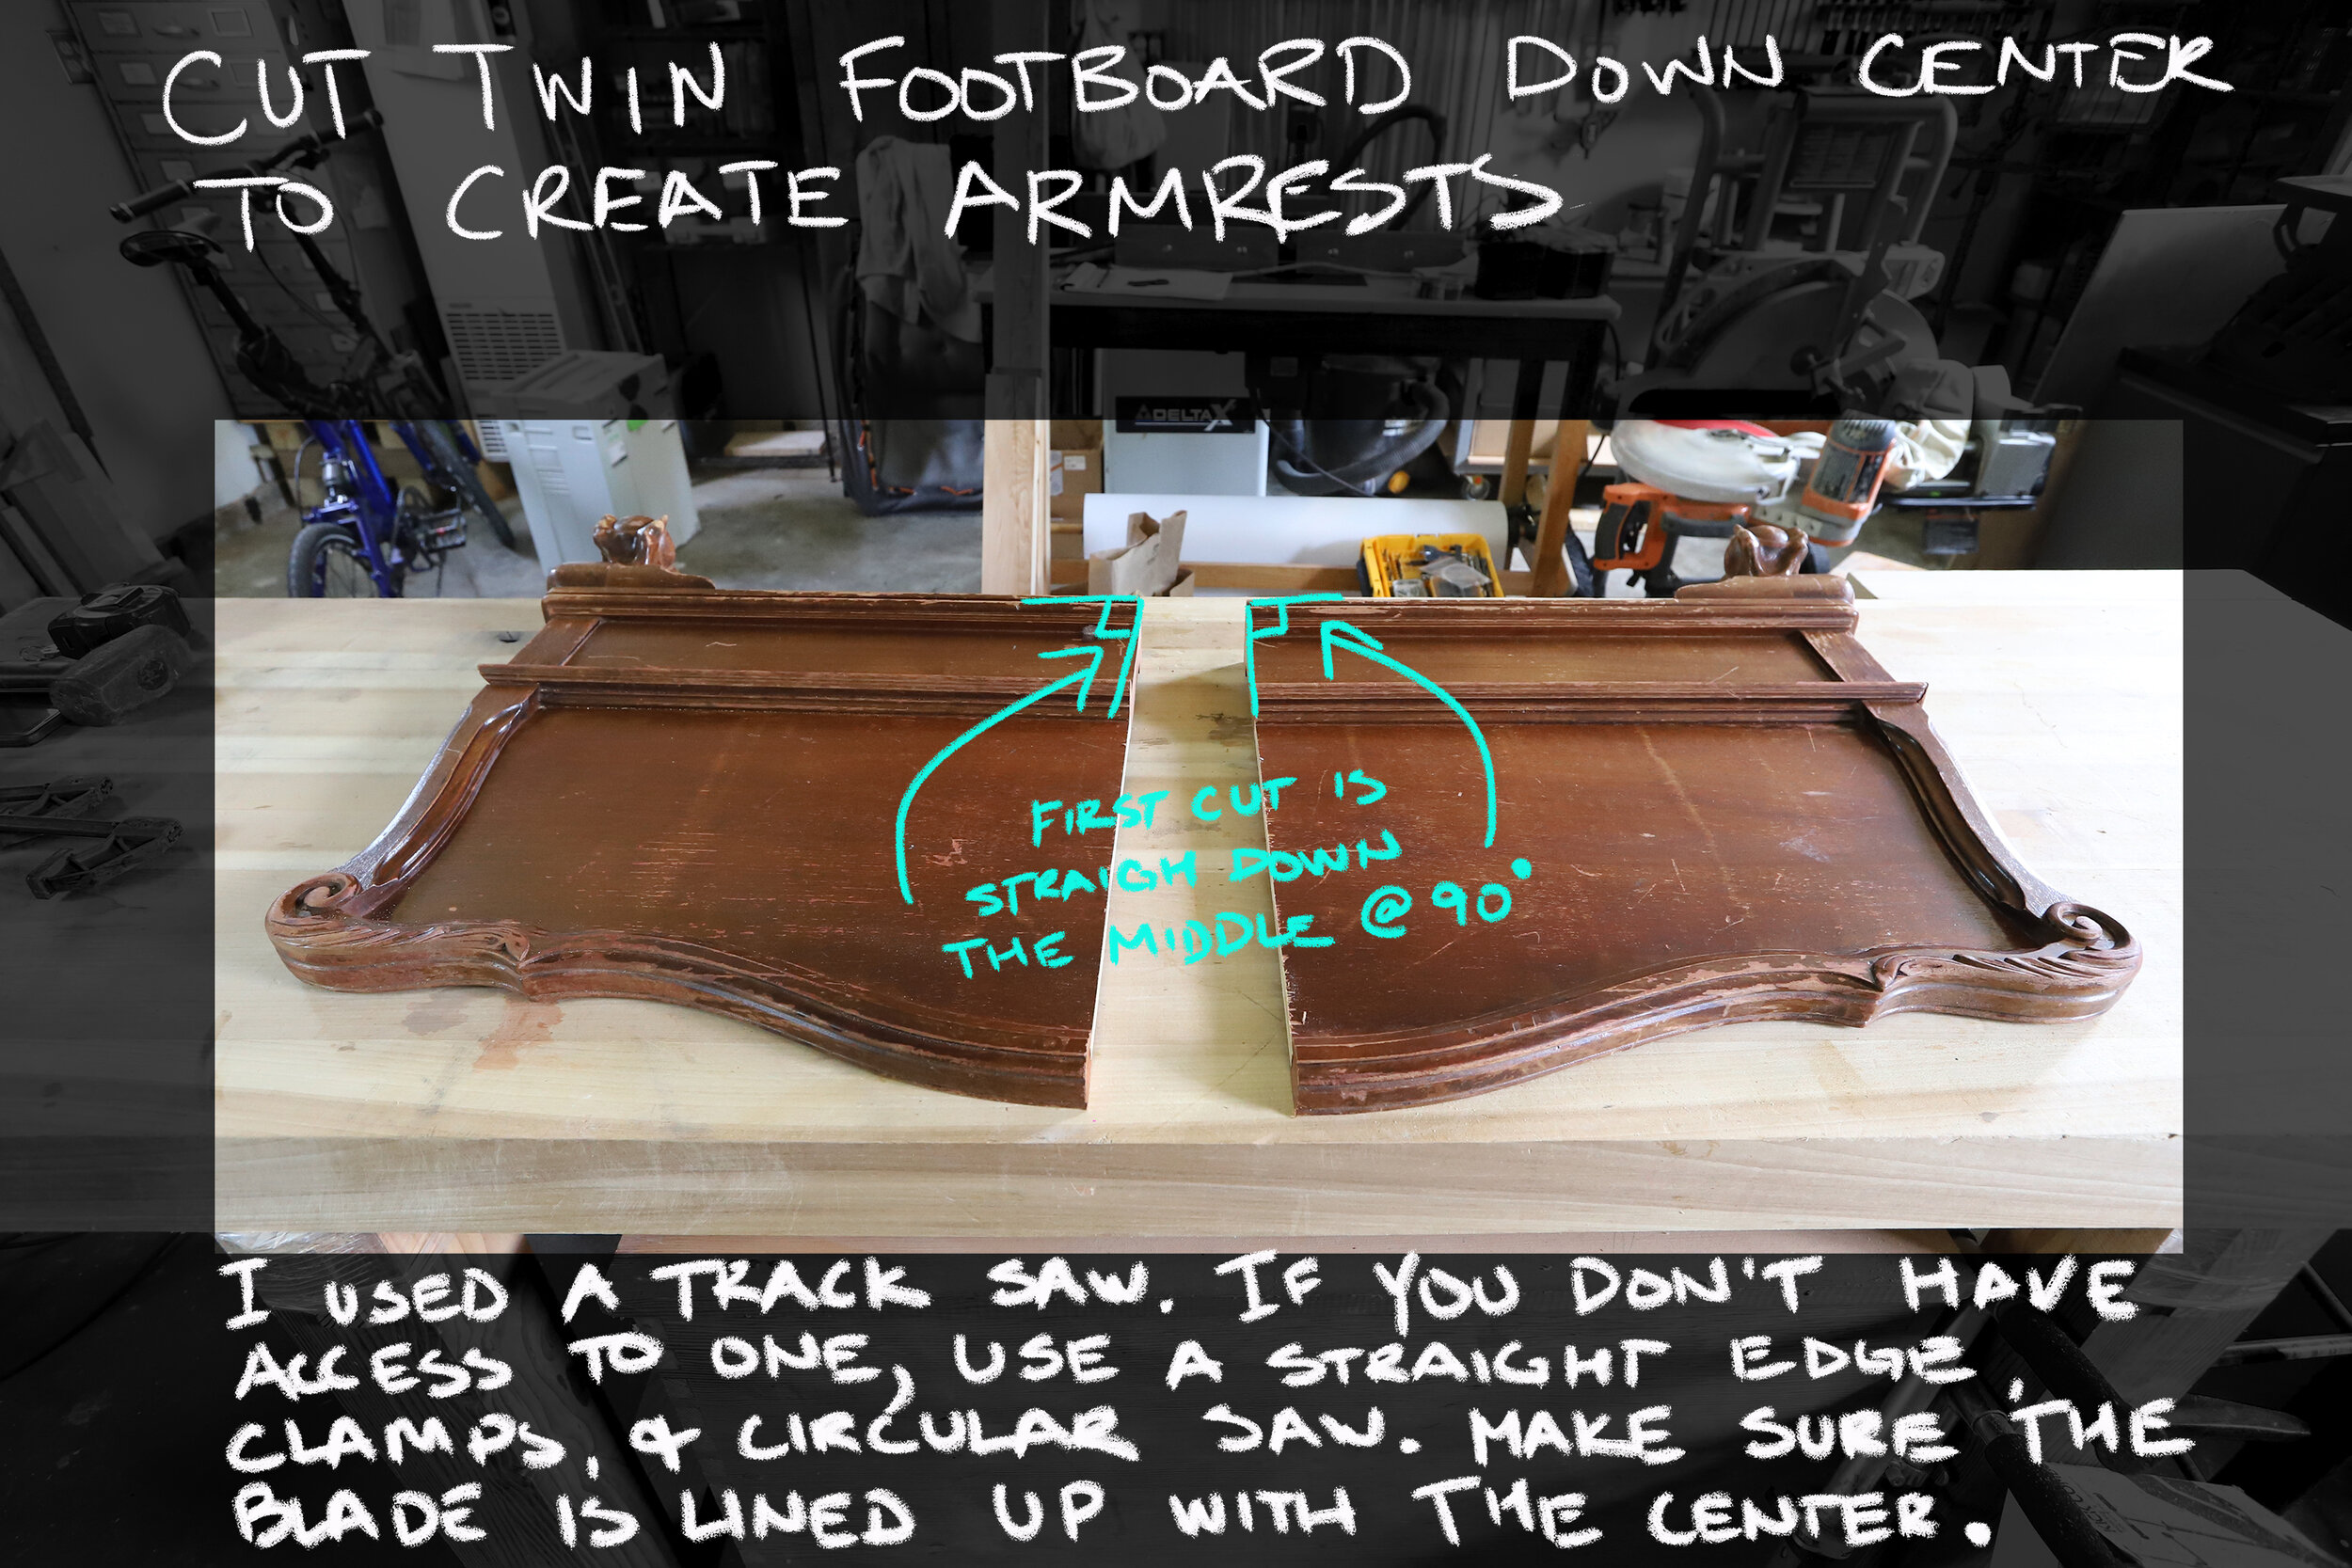
It’s not in its finished state but it’s pretty much built. I only need to put the finish on to make the two different wood species look similar and install the hardware to hang it. I used a queen headboard for the back and a twin footboard for the arms (both of which are solid wood and were purchased on FBMP). I used salvaged wood from previous projects for the seat. This is a key piece of furniture for this porch project. Along with always wanting a covered front porch, I also always imagined it with a comfortable porch swing and maybe some rocking chairs. Of course, it would’ve been easier to purchase a generic swing from a store, but I want to furnish this porch from materials that already exist. Materials that would’ve otherwise would’ve been deemed useless. The footboard was broken and missing the headboard that went with it. The headboard was being sold without its footboard.
This is not an original idea. When I searched for DIY porch swings, a bunch of sites popped up with instructions. So why am I adding to the pile of DIY instructions on the interwebs? Good question! In short, every single one of those tutorials produce a pretty cute swing but none of them will be comfortable to sit on for any length of time. Why? They are all built with a back that is 90 degrees to the seat or at some random, unspecified angle. I do not do things haphazardly. I did some quick research and found out the angles and heights necessary for comfortable seating, because it would be a crying shame if you built something you hated sitting in!
The diagram below shows the ideal shape for comfortable sit-back-and-relax type of seating. The angle between that seat and the backrest needs to be 100 degrees. The seat should be tilted back at an angle of 12 degrees from horizontal. The front edge of the seat should be no more than 21” off the ground.

The seat angle and height from the floor are determined when the swing is hung. The back angle needs to be considered when building the swing. If you’re interested in building something similar yourself, it’s a fairly easy build.
Tools and hardware:
- Drill and drill bits
- Driver
- Palm sander (or sandpaper with a sanding block)
- Track saw (or circular saw + a straight edge and clamps to act as guides)
- Clamps
- Wrench
- Construction screws
- Trim head screws
- Lag screws
- Wood glue
- Safety glasses
- Ear protection
- Dust mask
Note: I’m not giving exact measurements for most of these pieces since the headboards you buy come in lots of different shapes and sizes so each build will be a little different.
Step-by-Step Instructions
Below these written instructions, you’ll find labeled pictorial instructions.
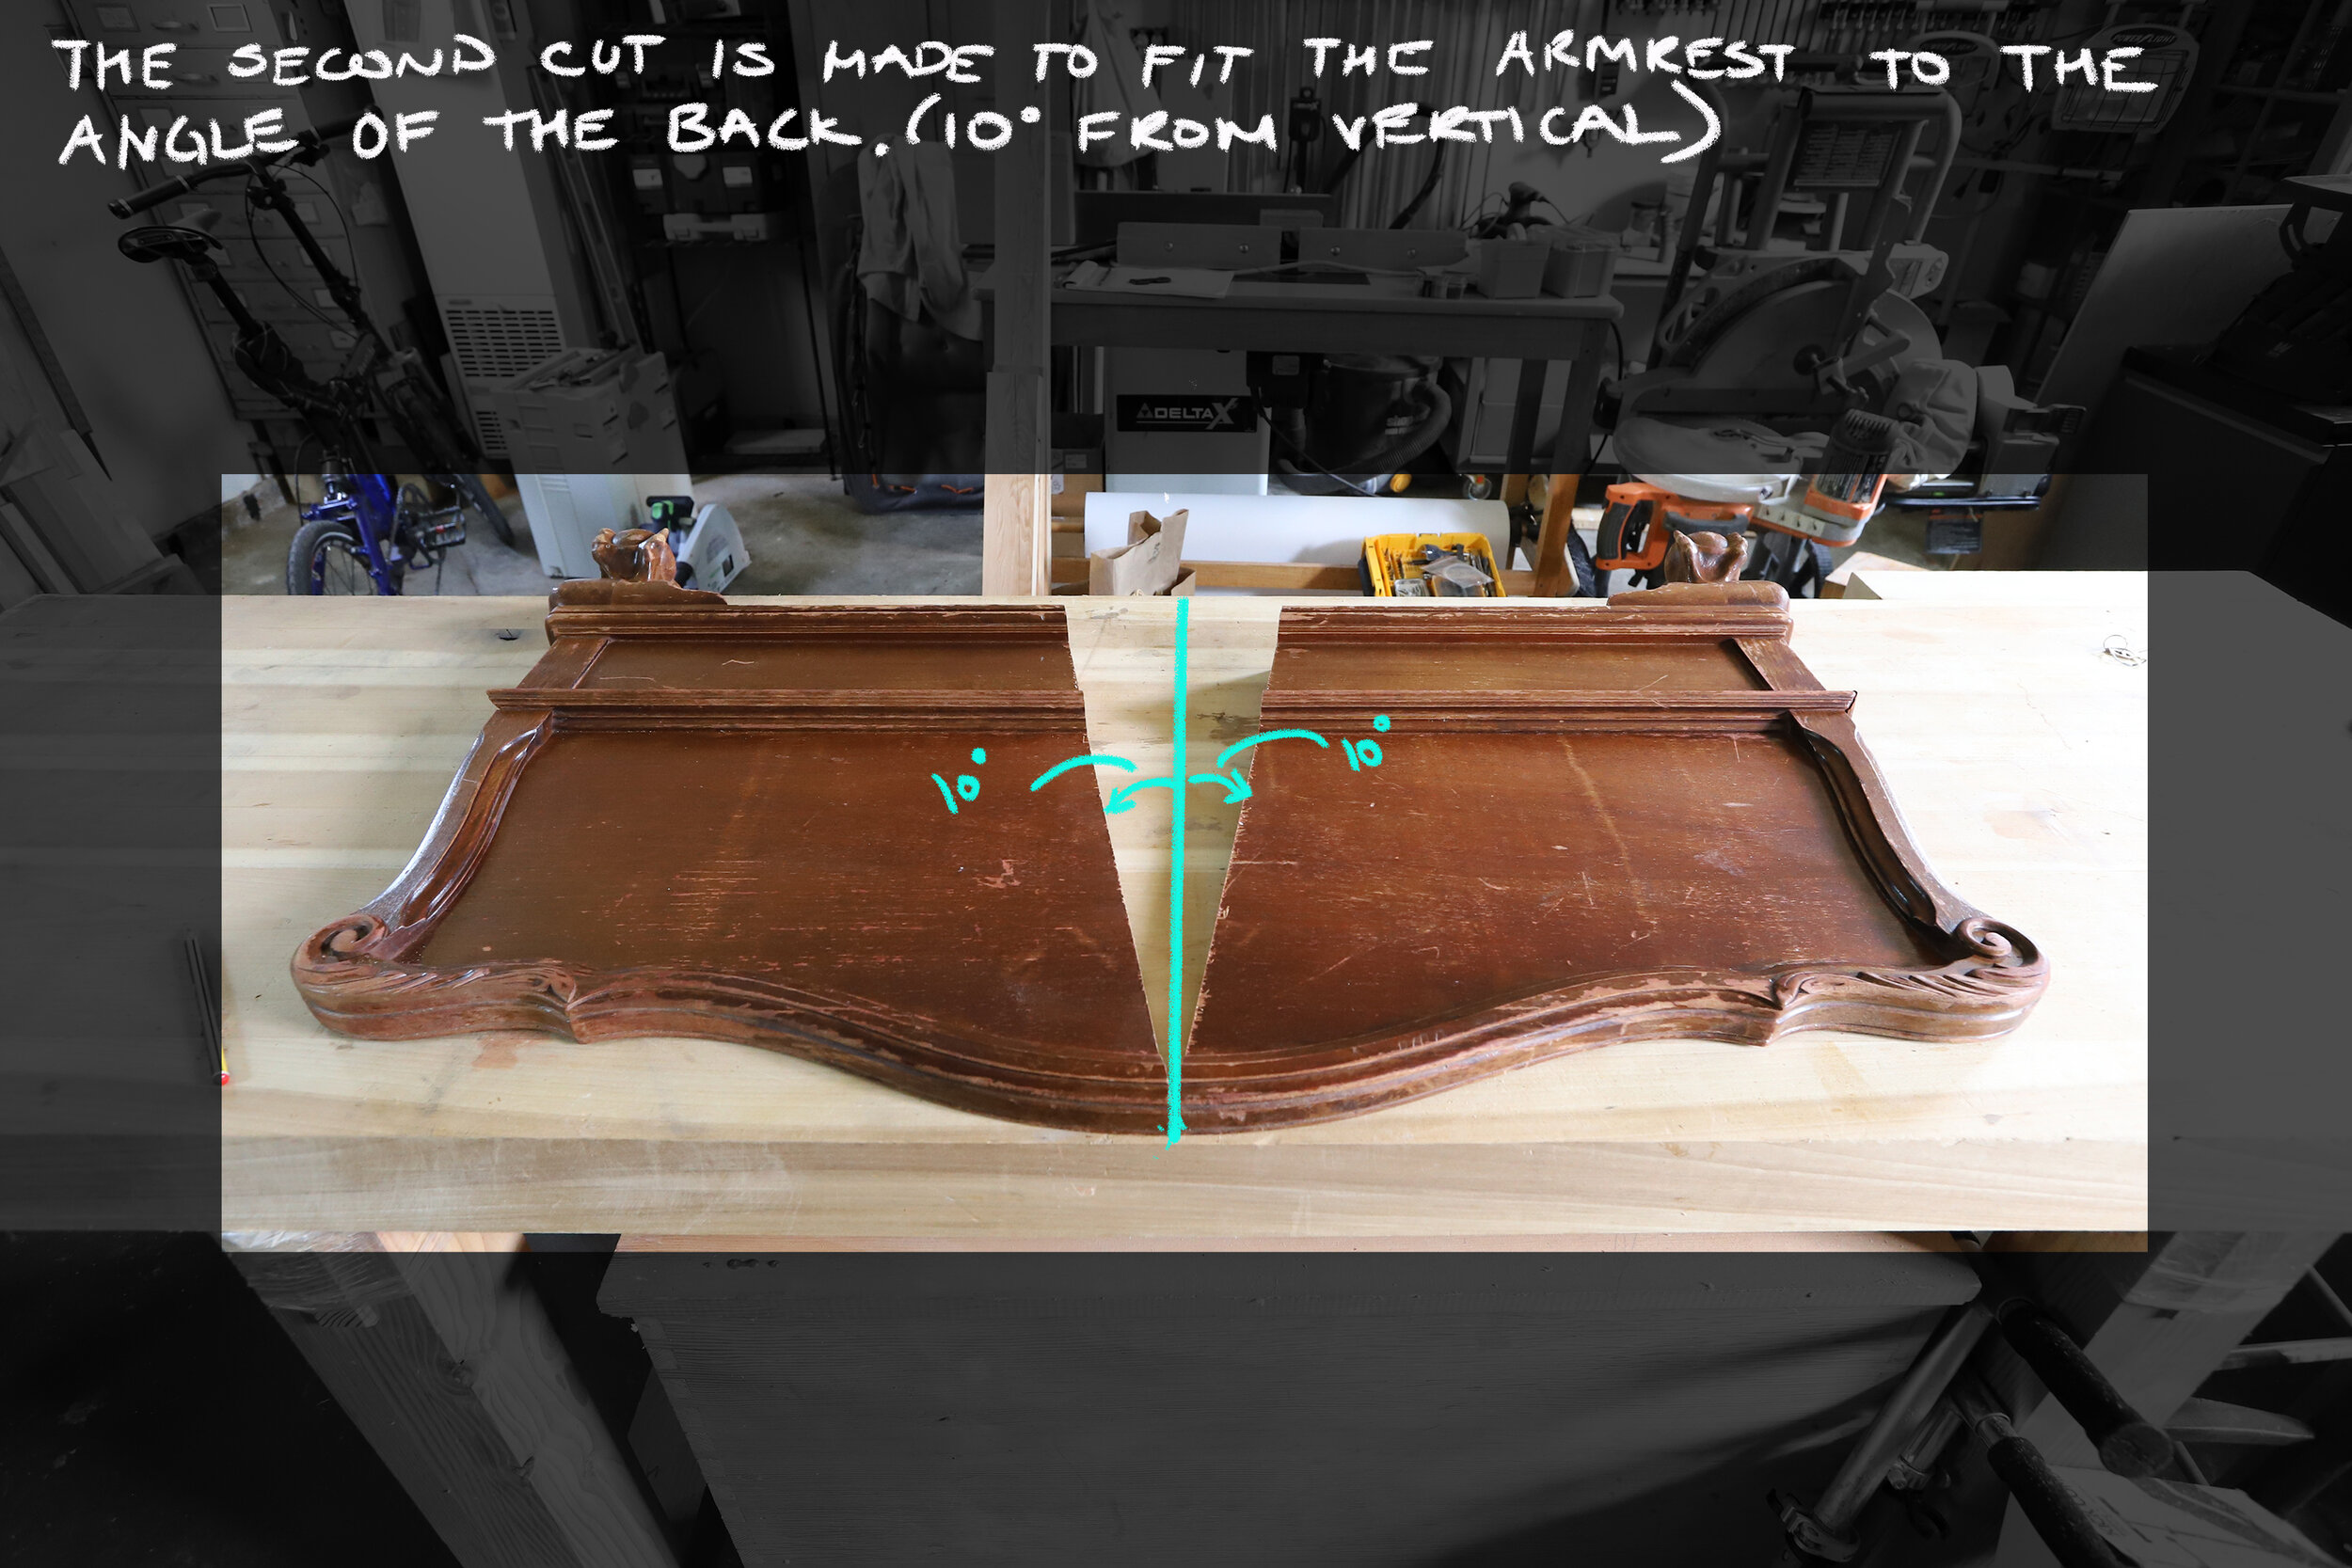
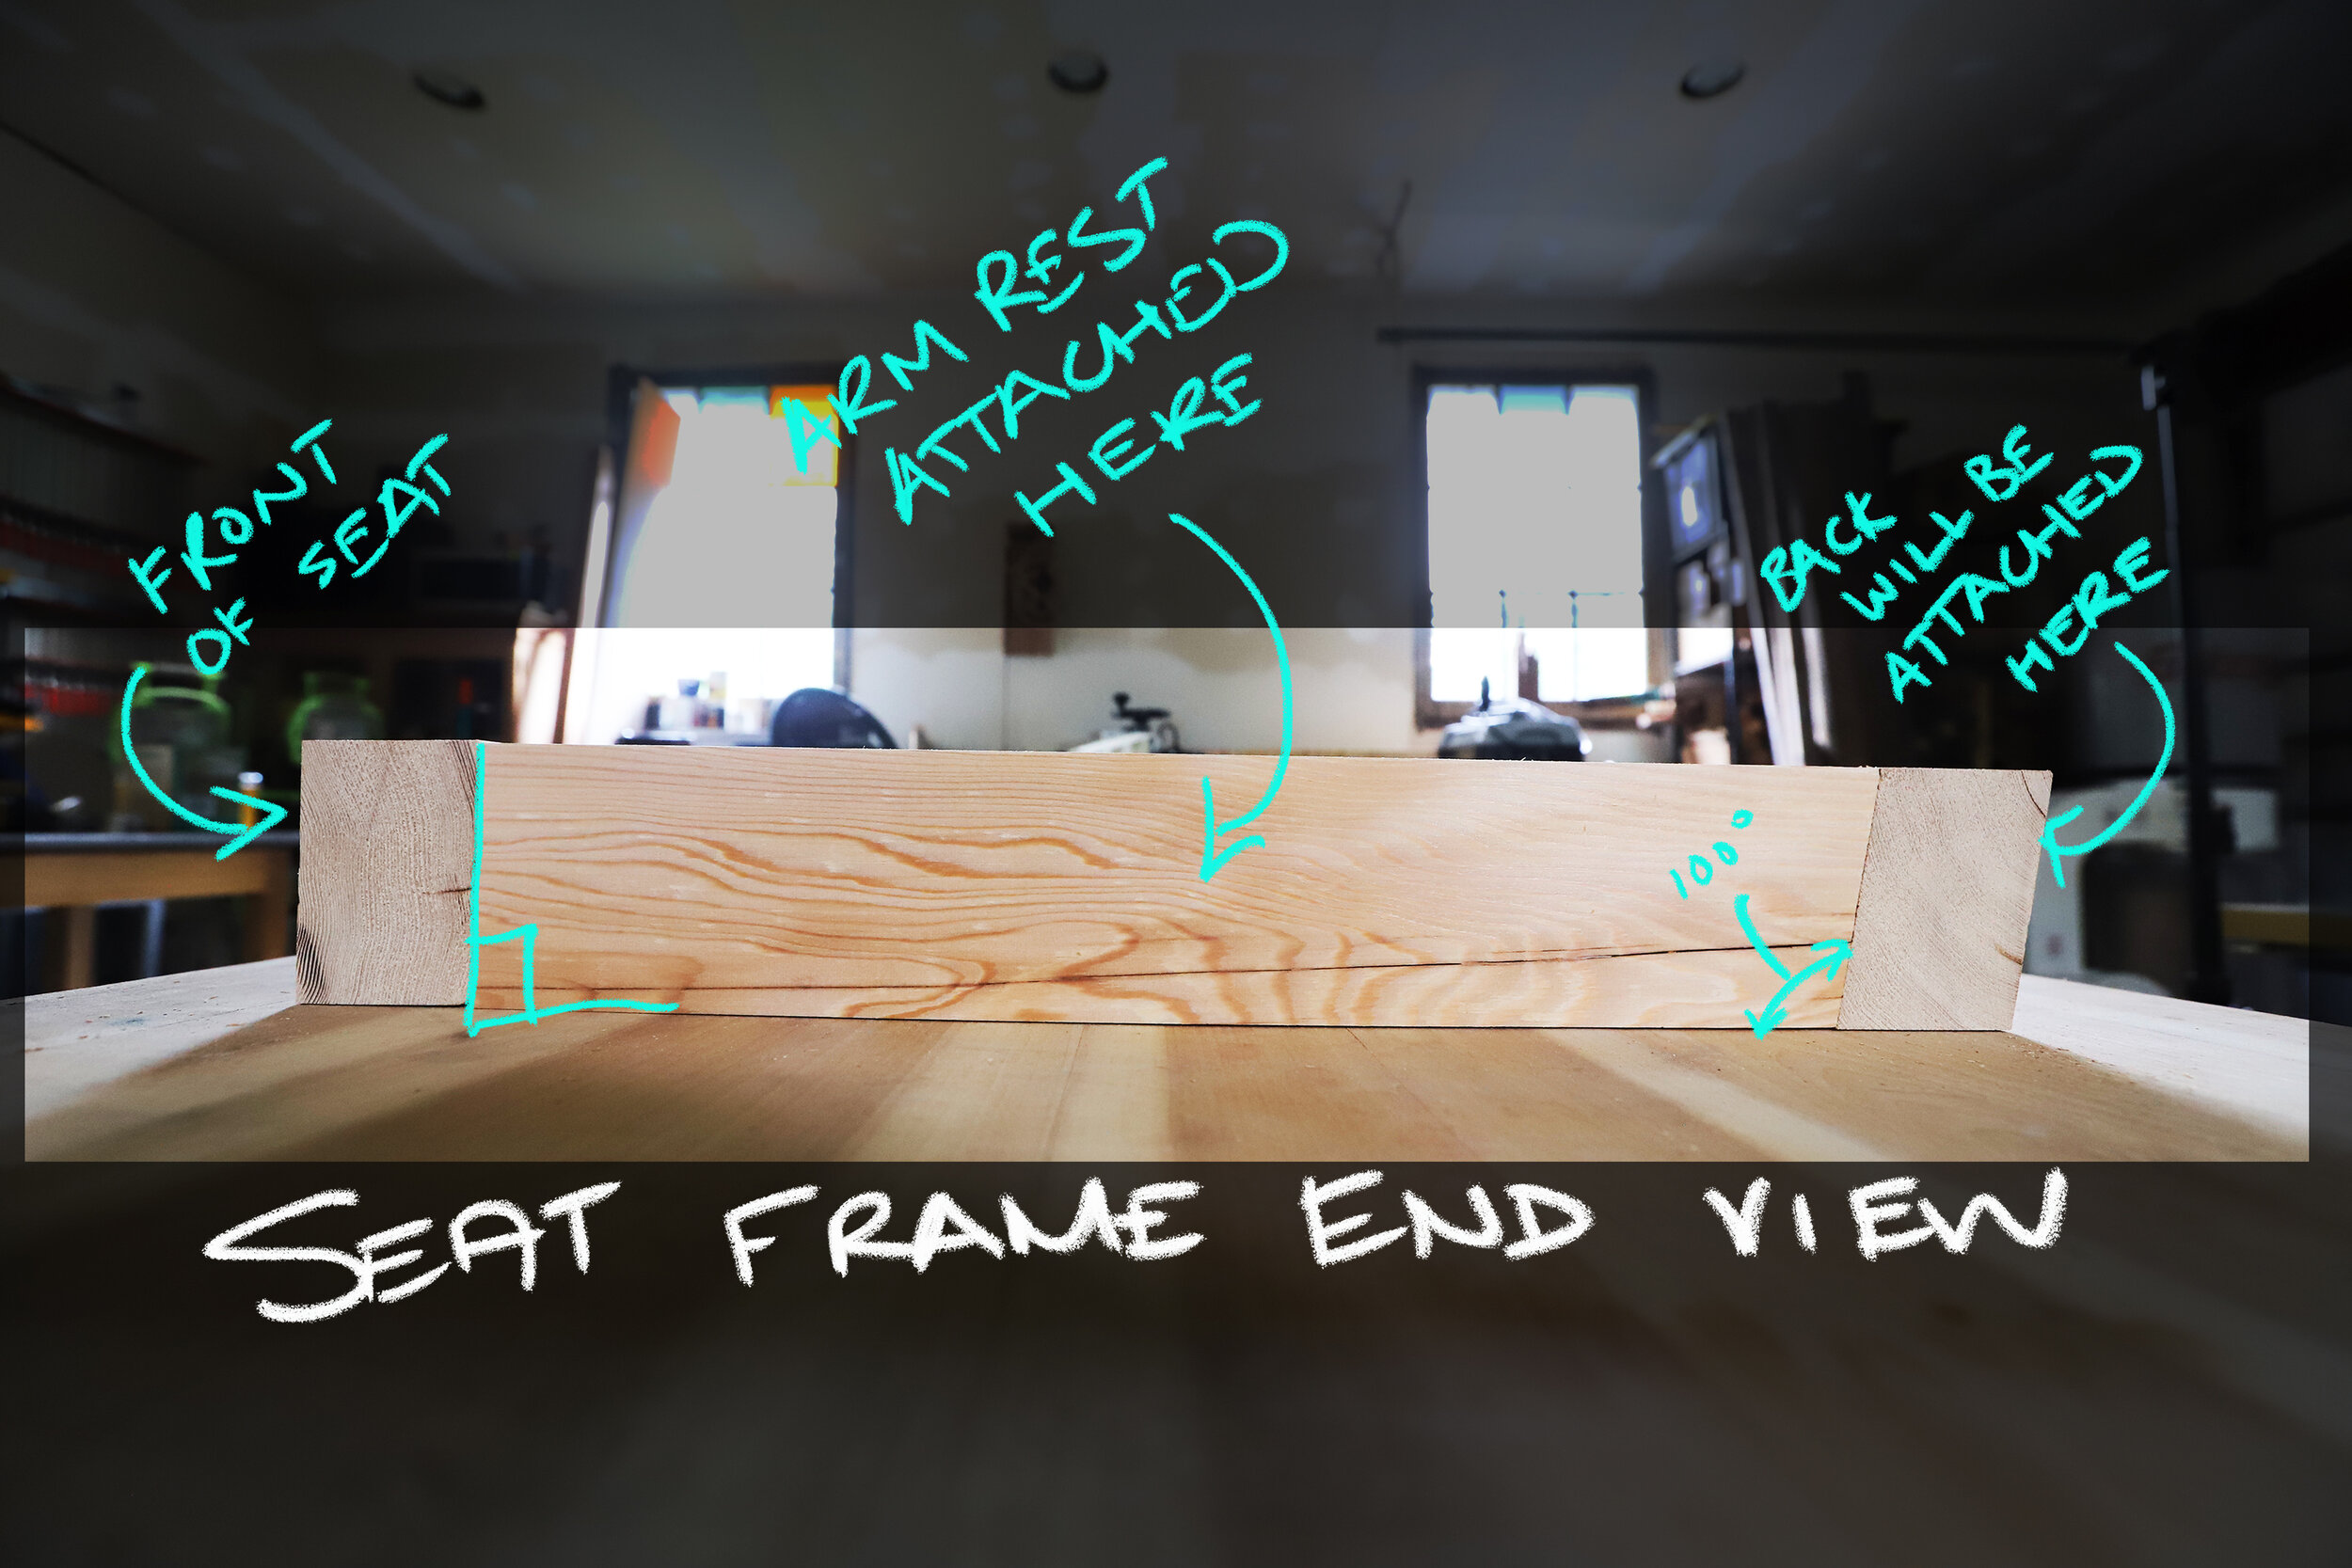
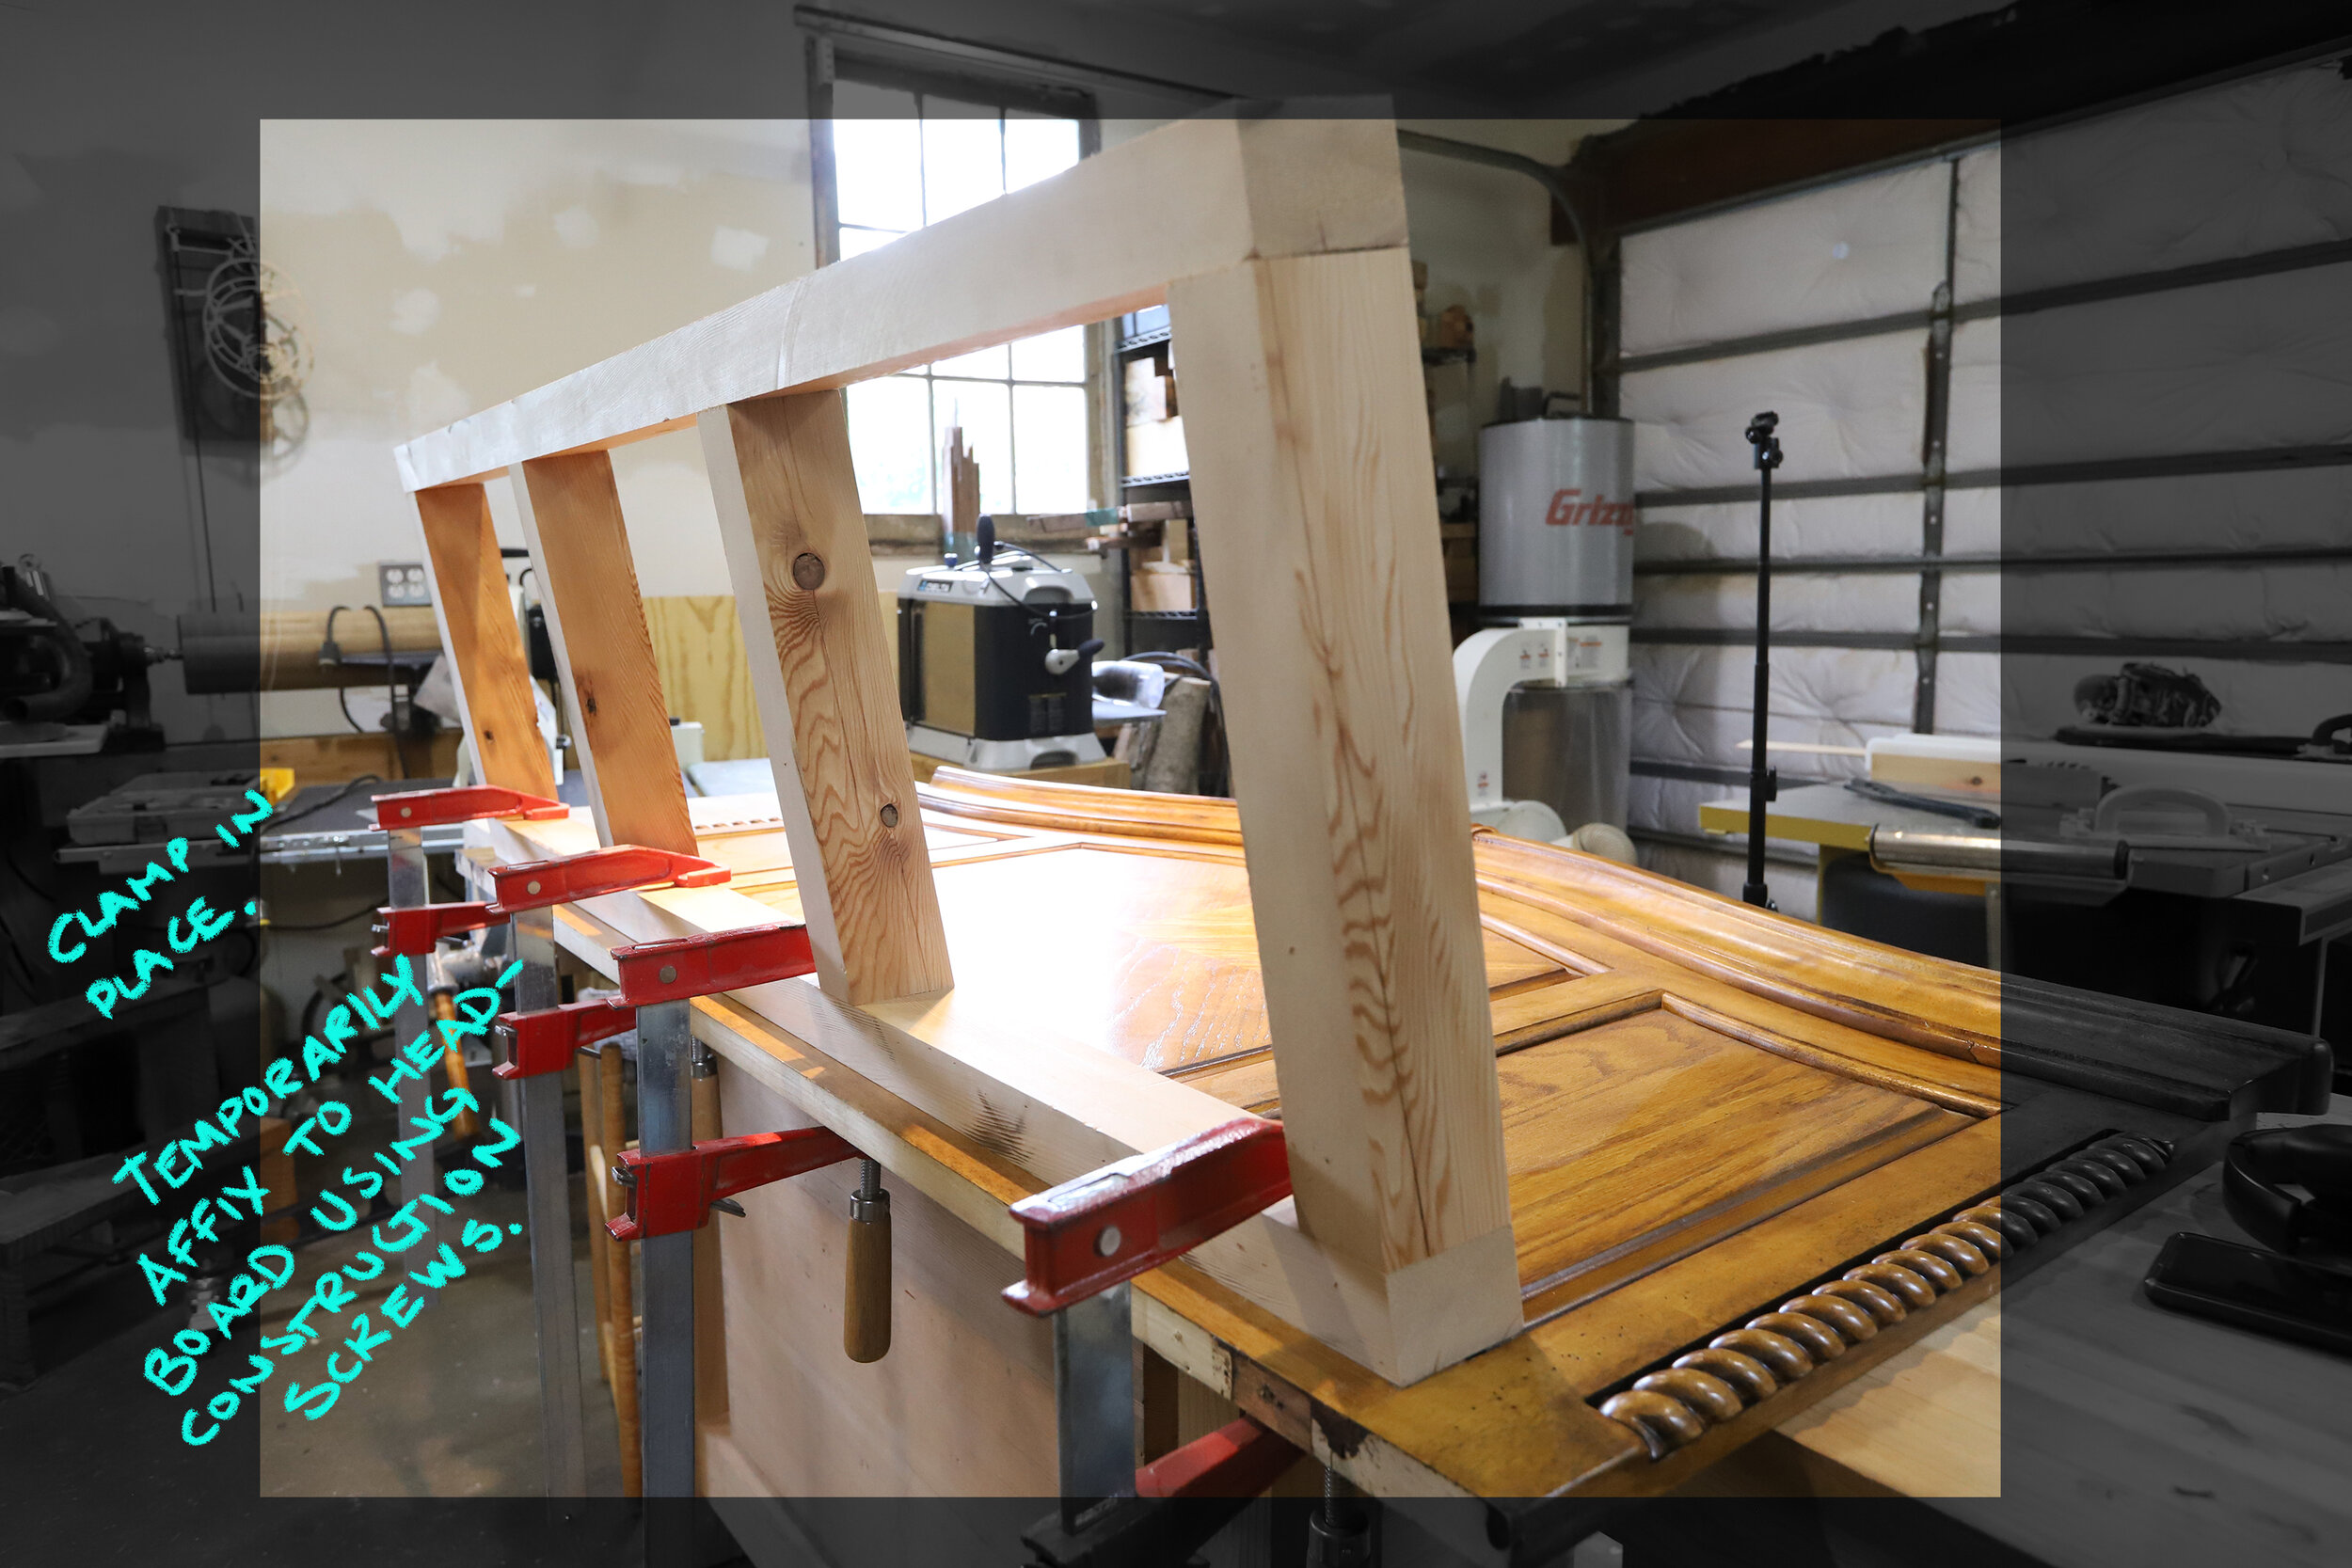
First, we build the frame for the seat. This is also what the arms and back are attached to. The key to the proper back to seat angle is in this step. You would get two 2x4 pieces of lumber and cut them down to the appropriate length for your headboard back. The pieces that run perpendicular to these two longer pieces need to be cut at a 10 degree angle at one end.
Note: I used a table saw to cut the edges of the long piece to which the back would be attached. This is not a necessary step since this piece is unseen in the finished product, but I liked how it made for a nice fit.
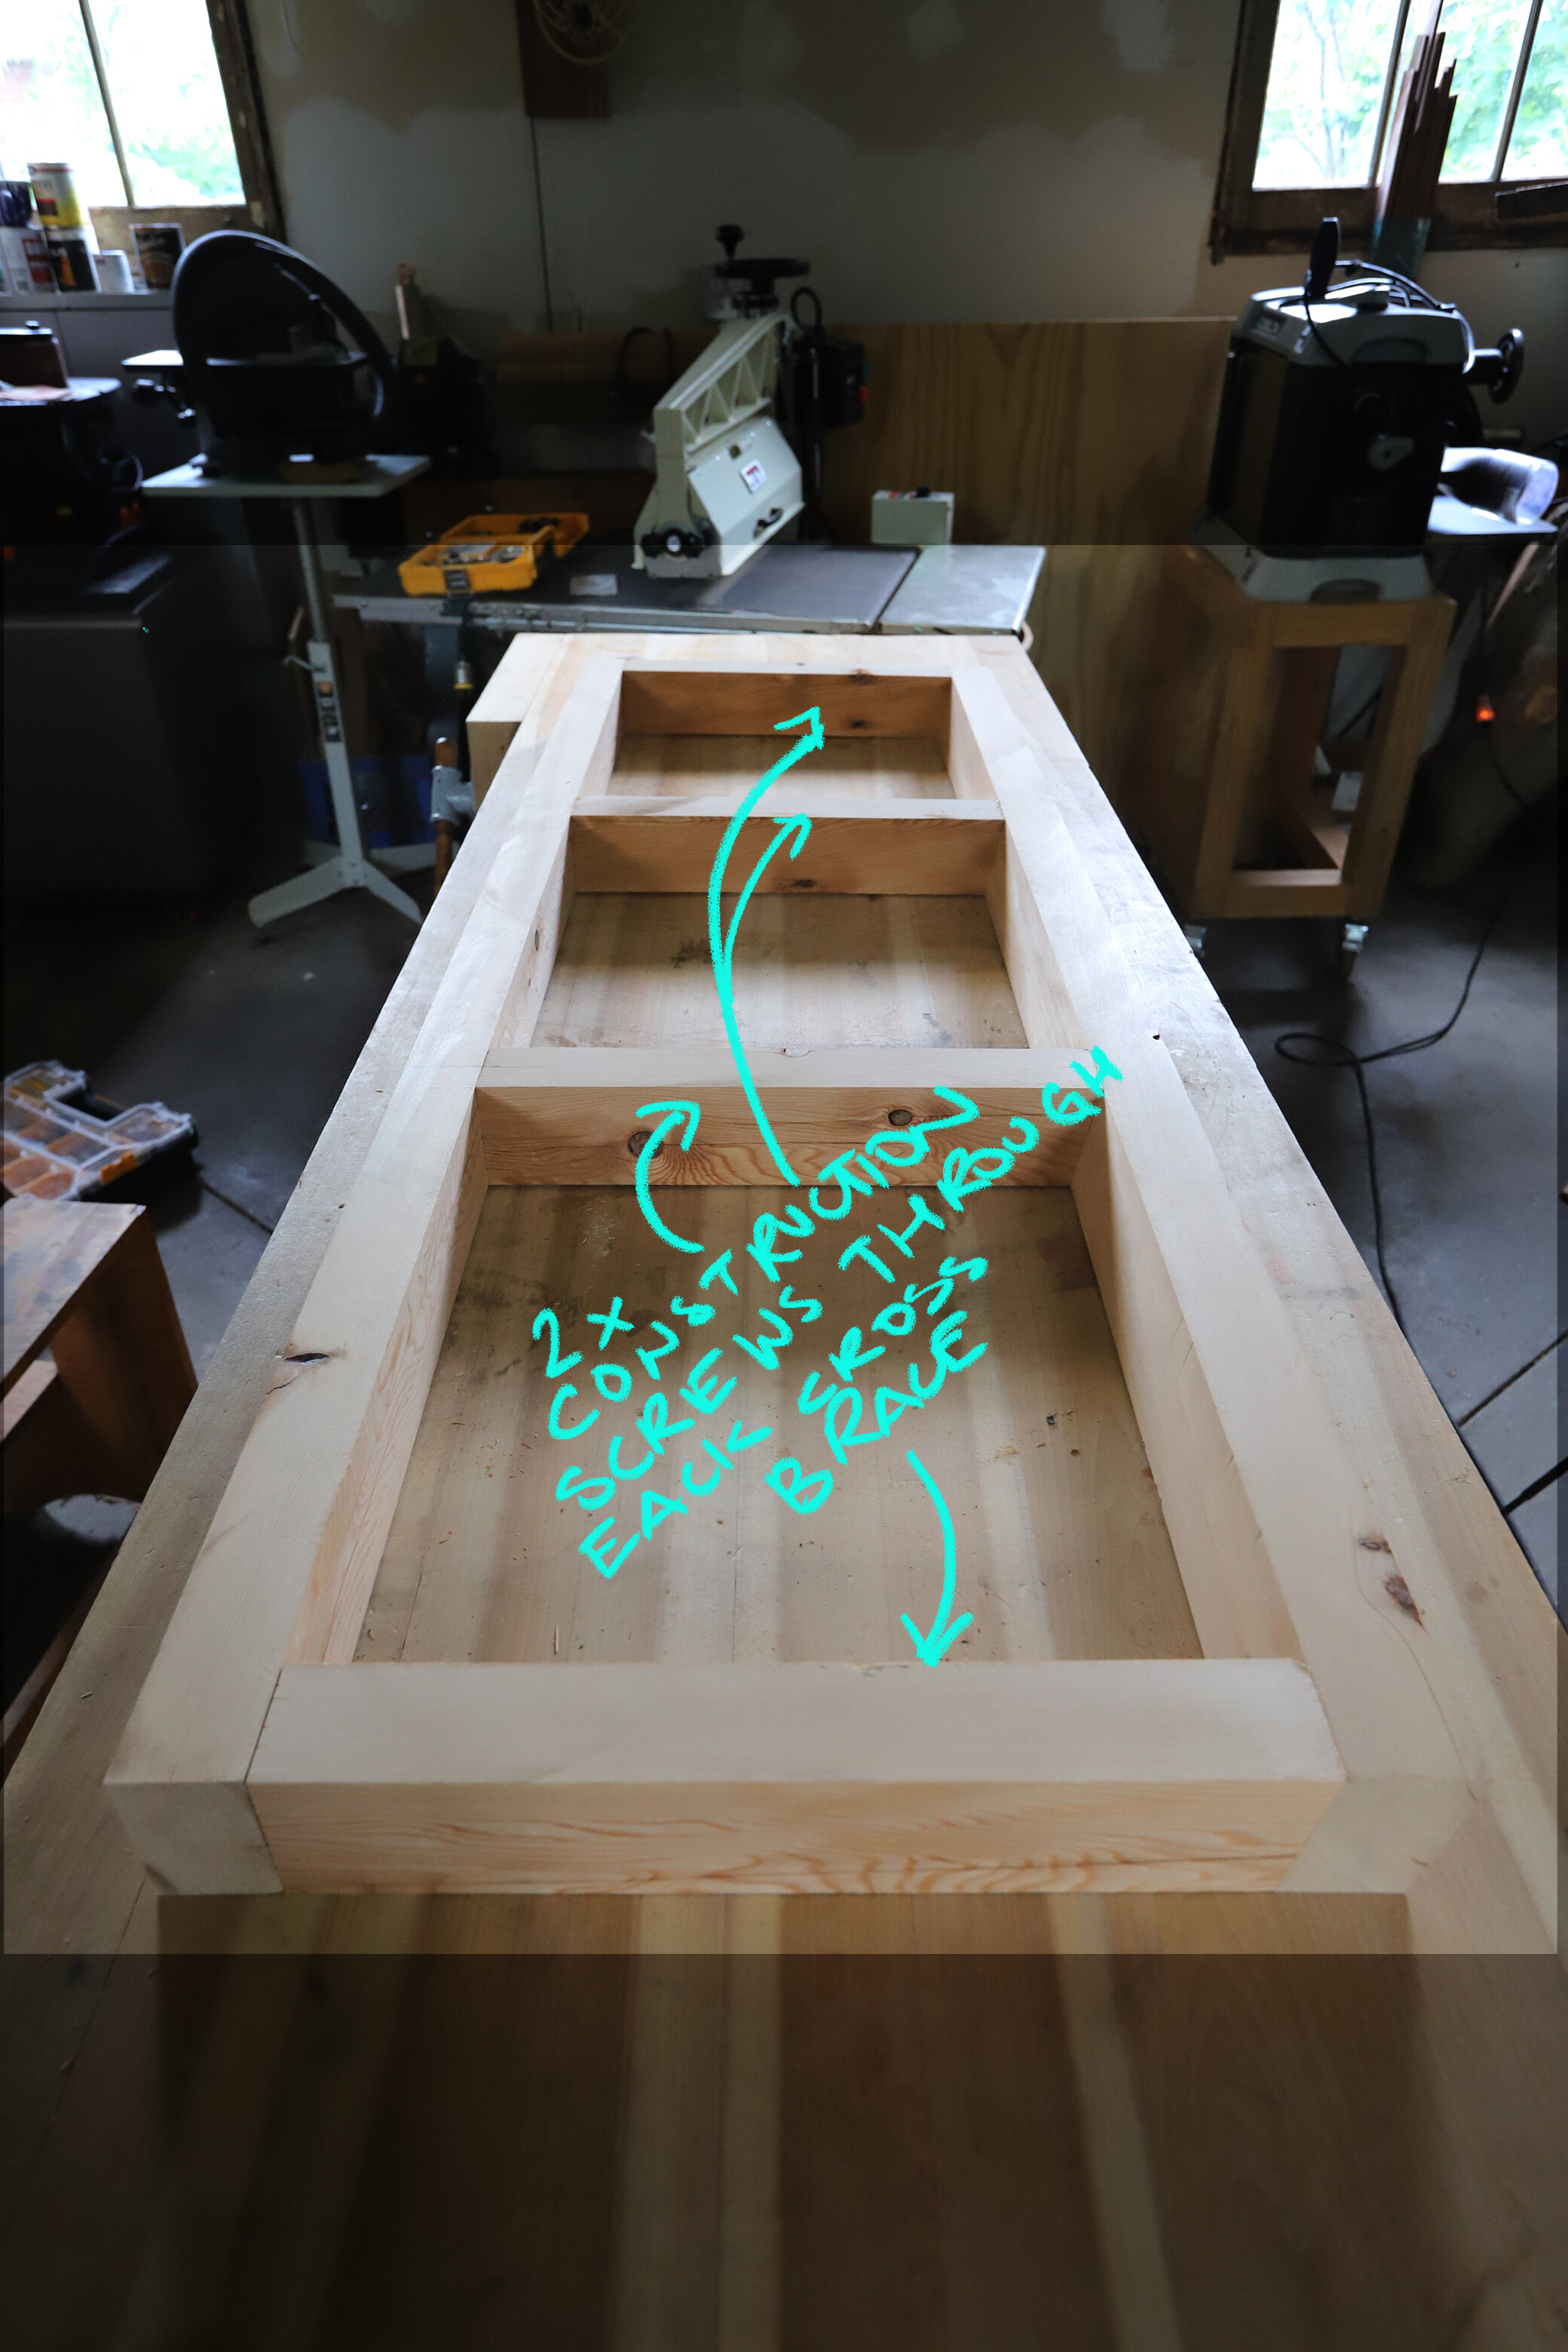
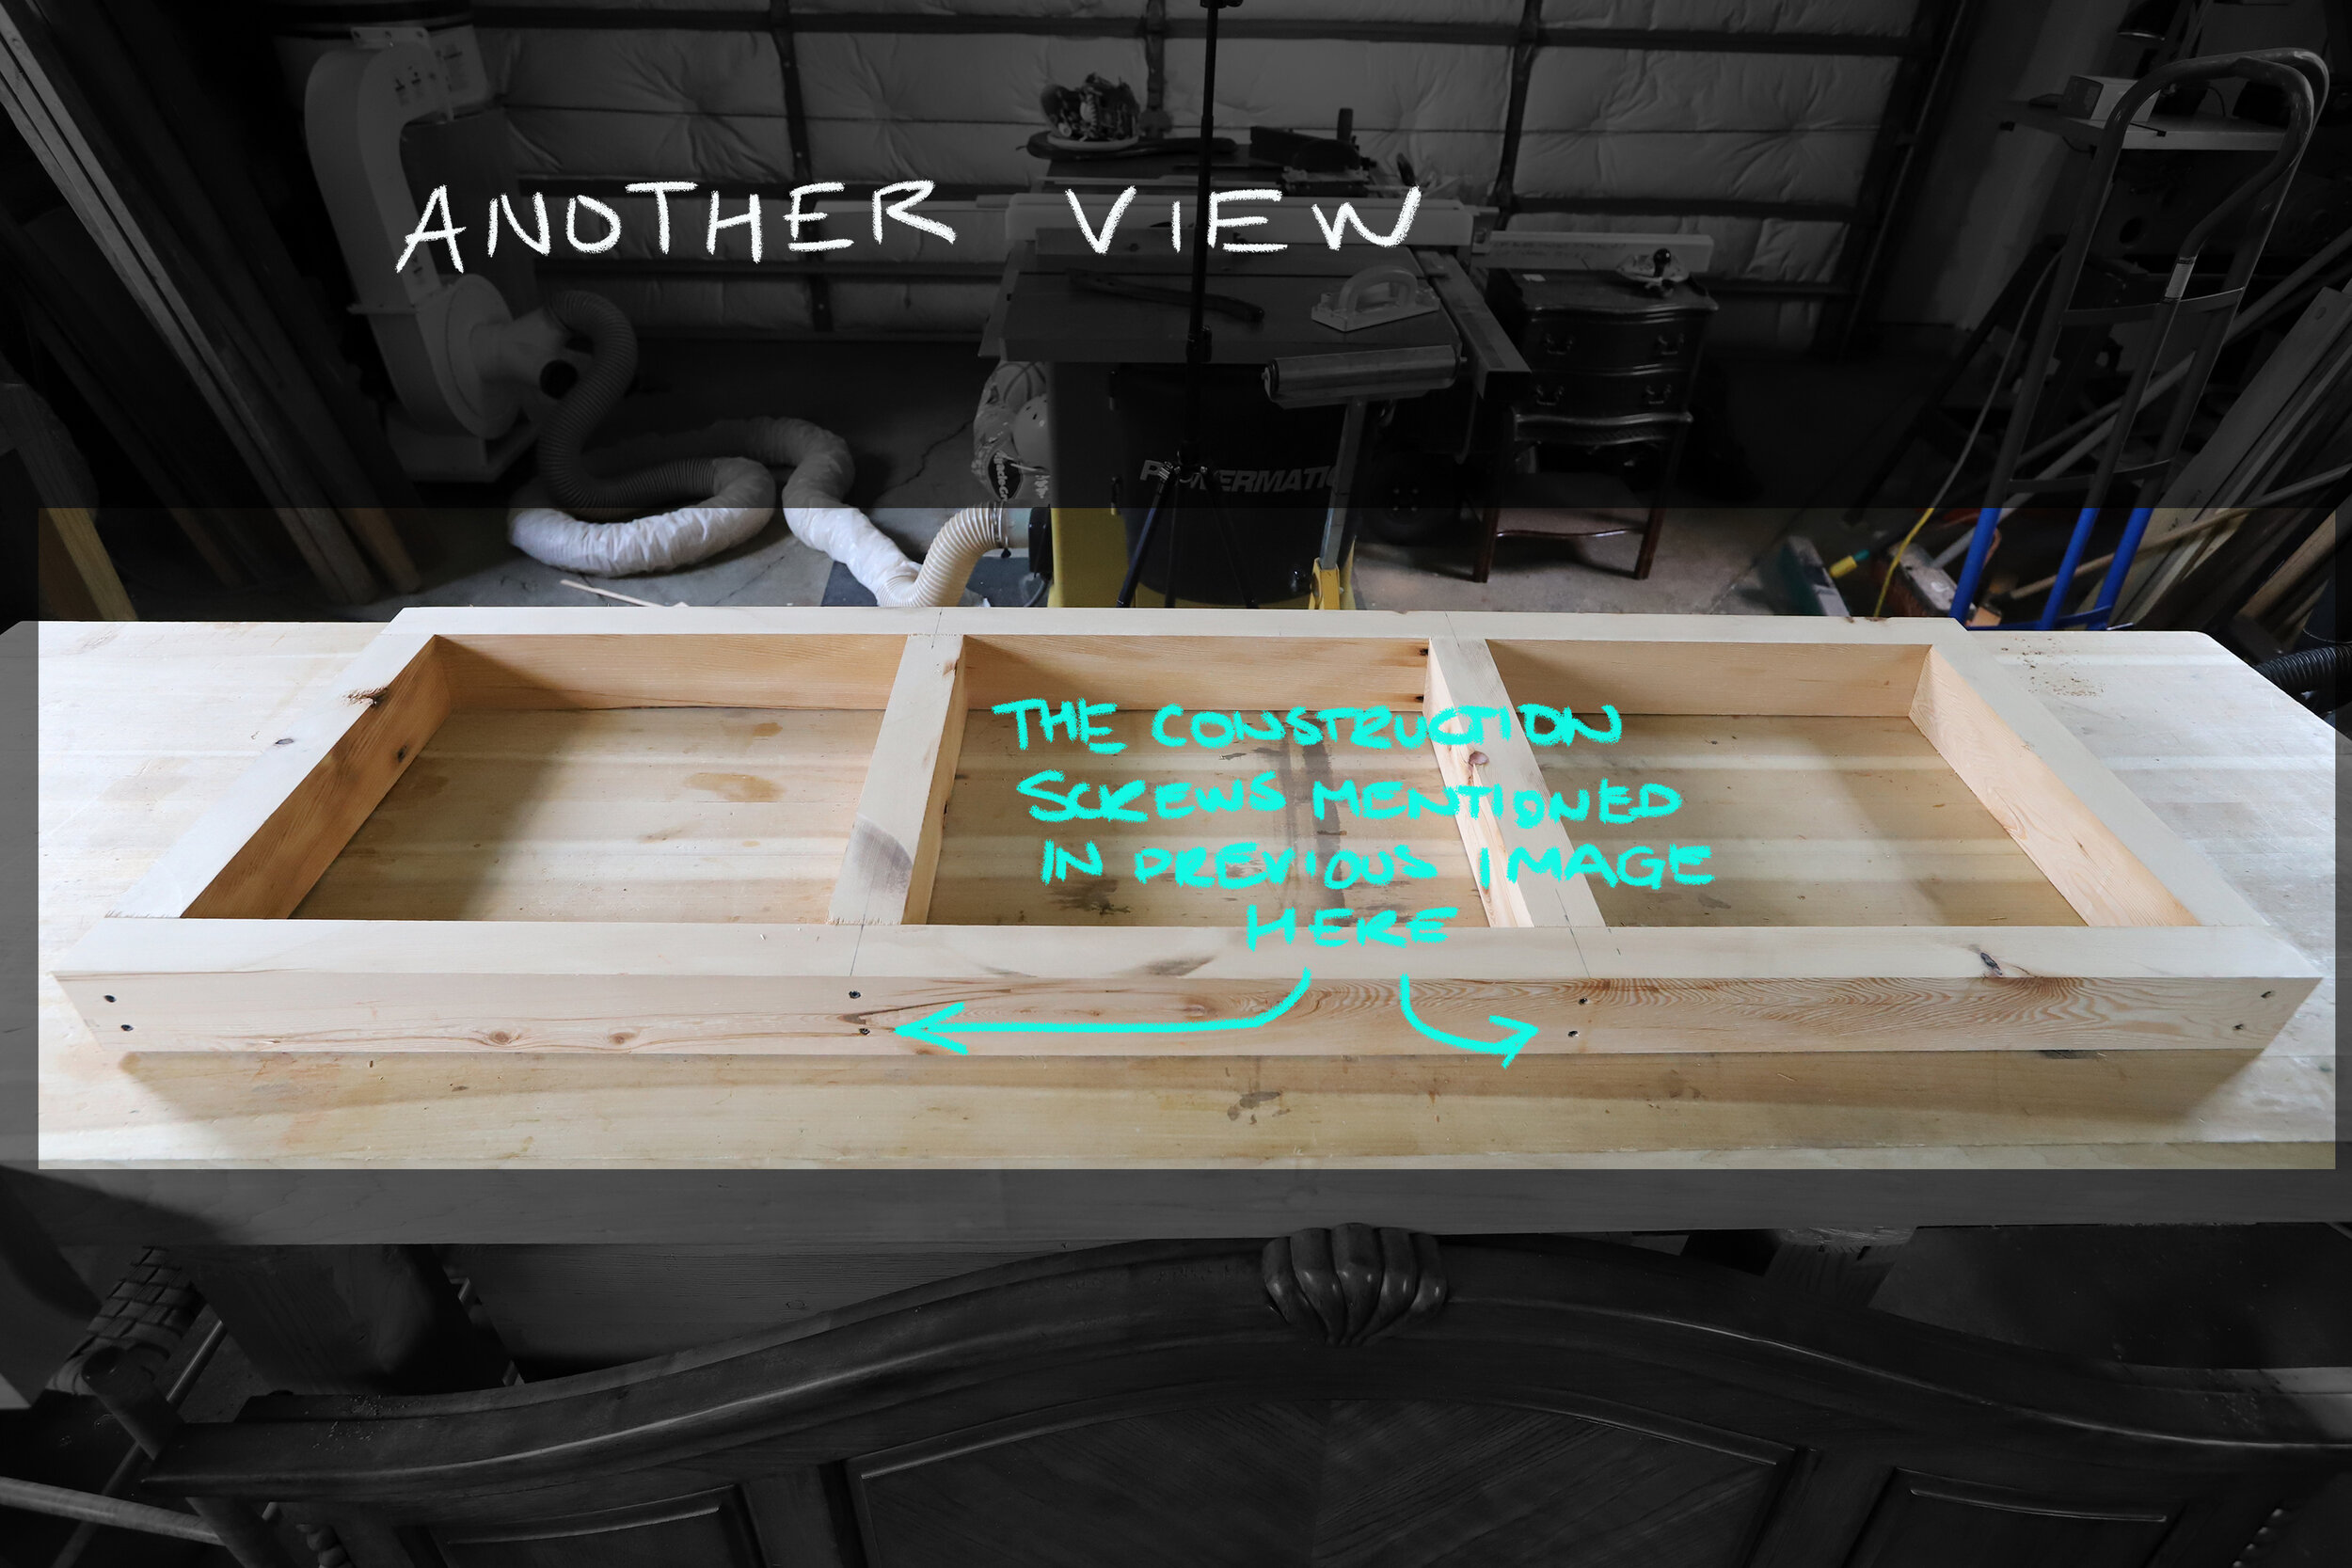
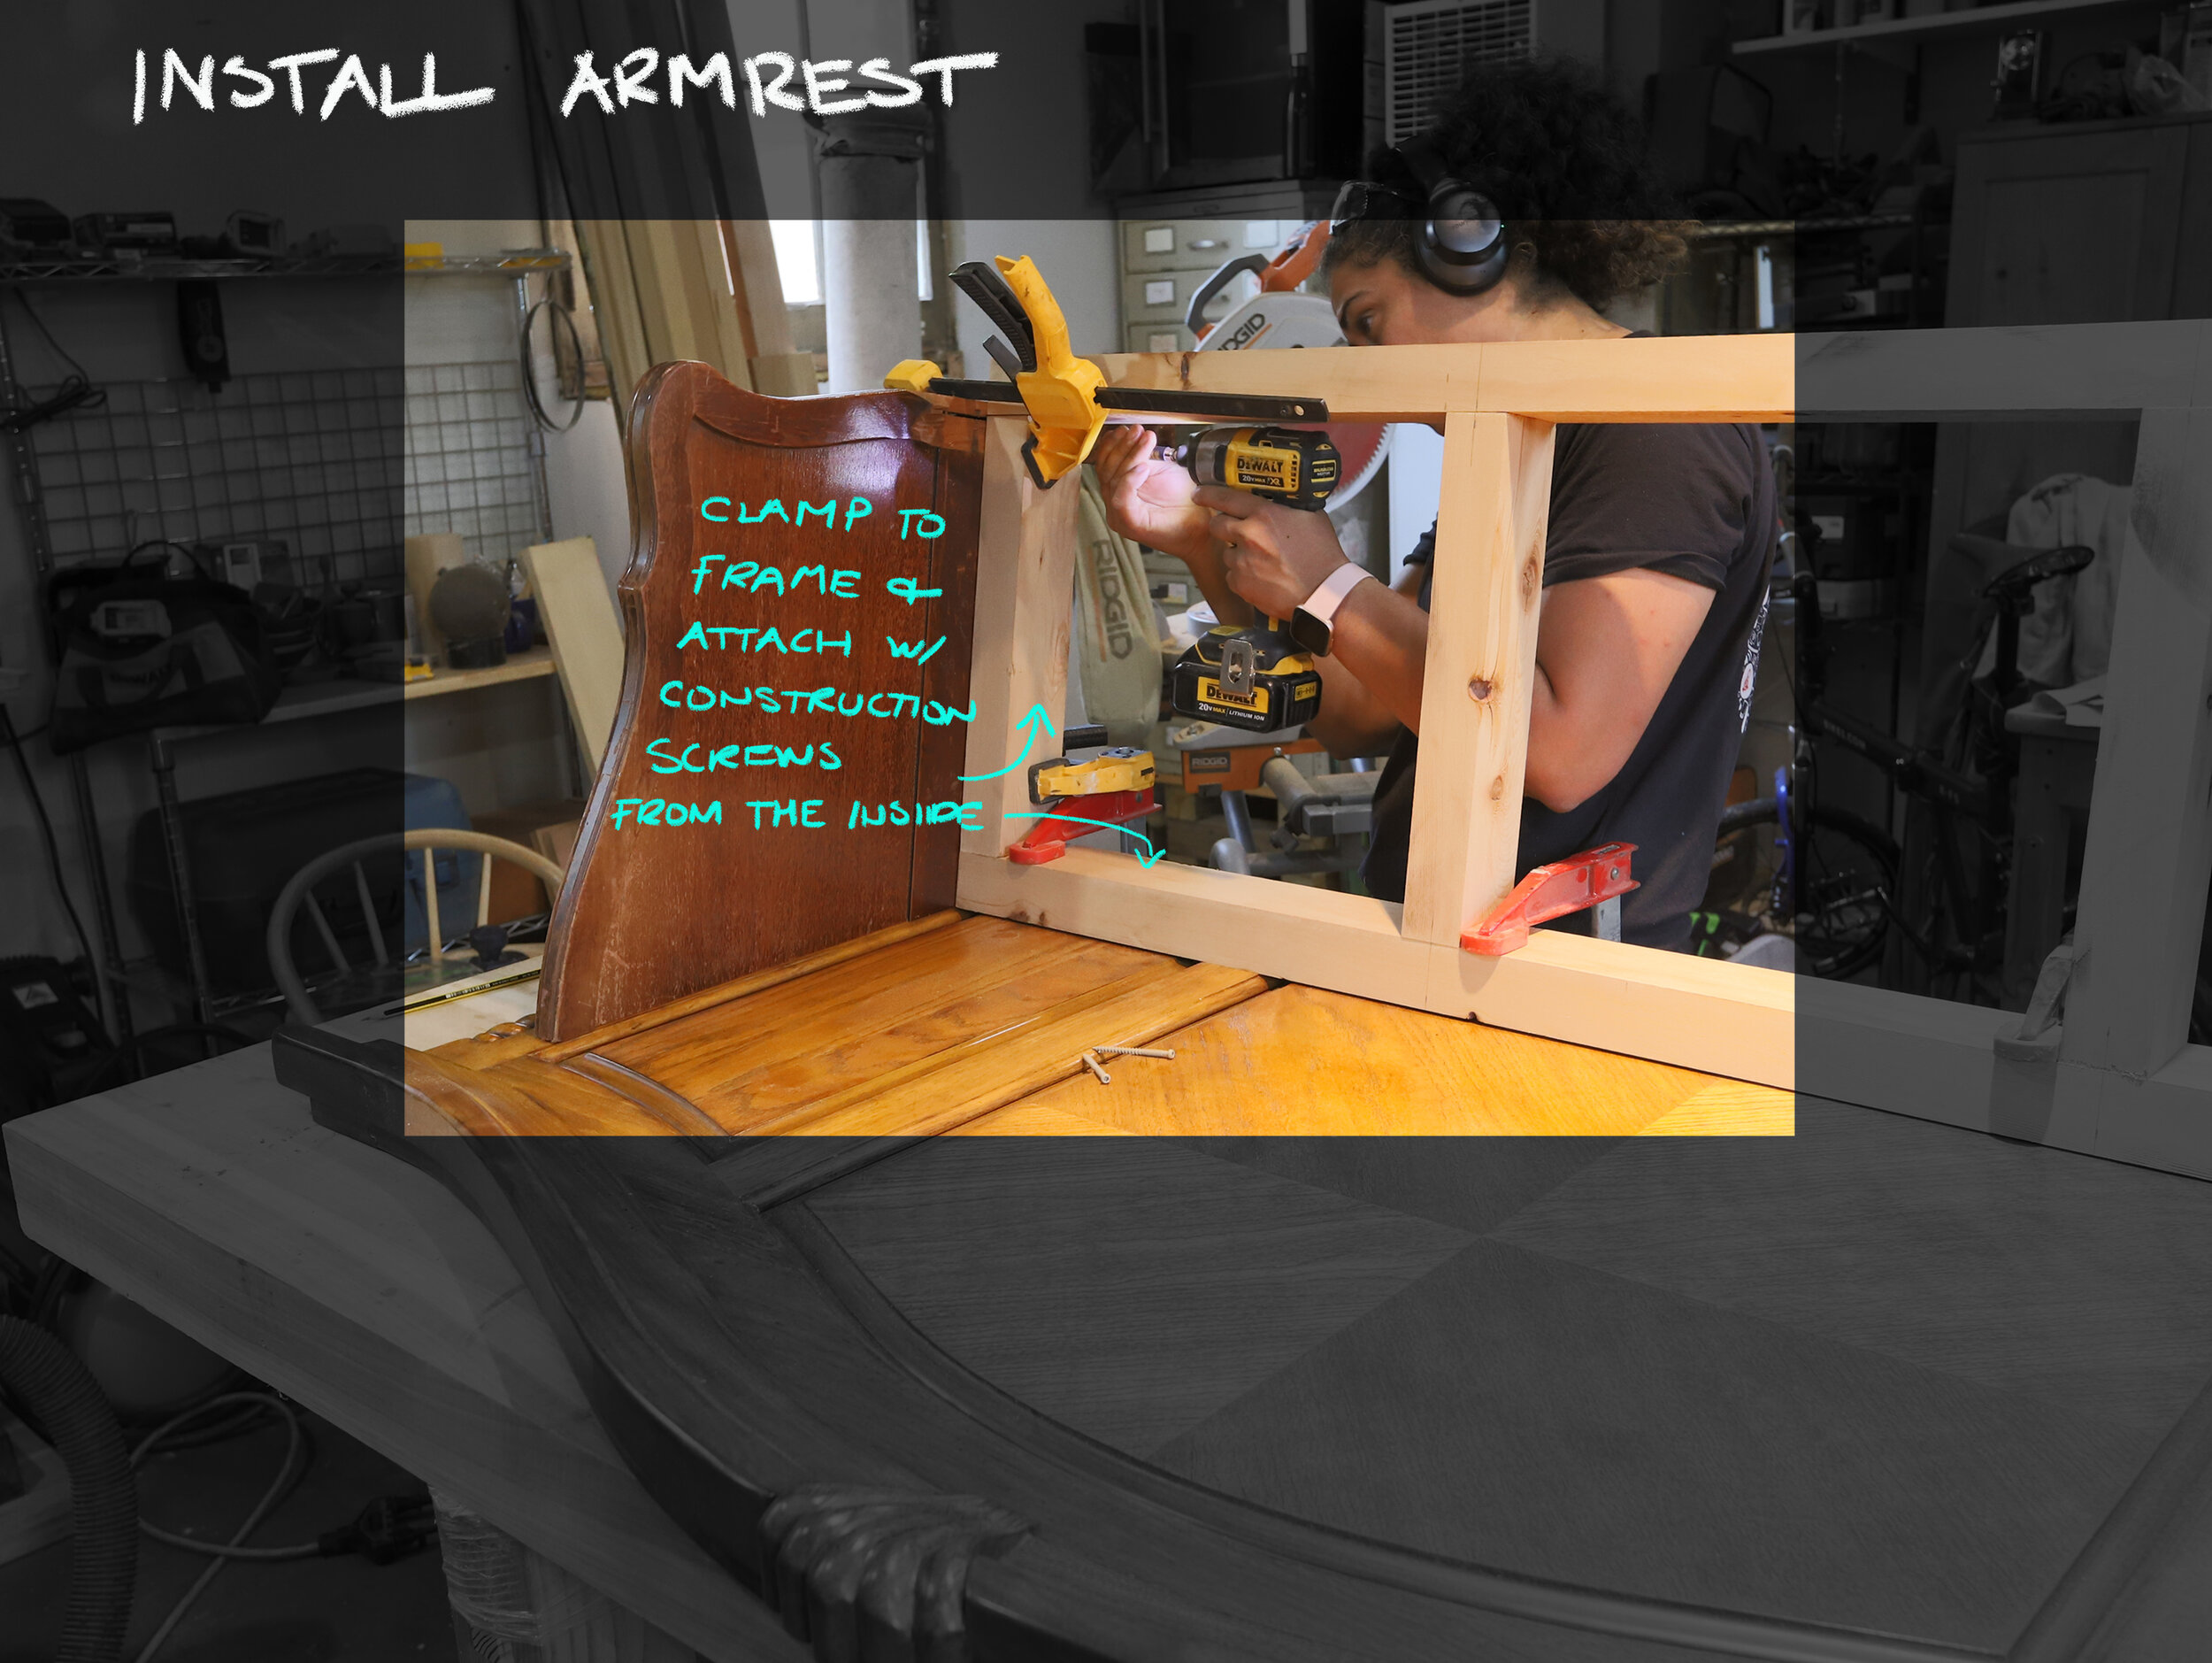
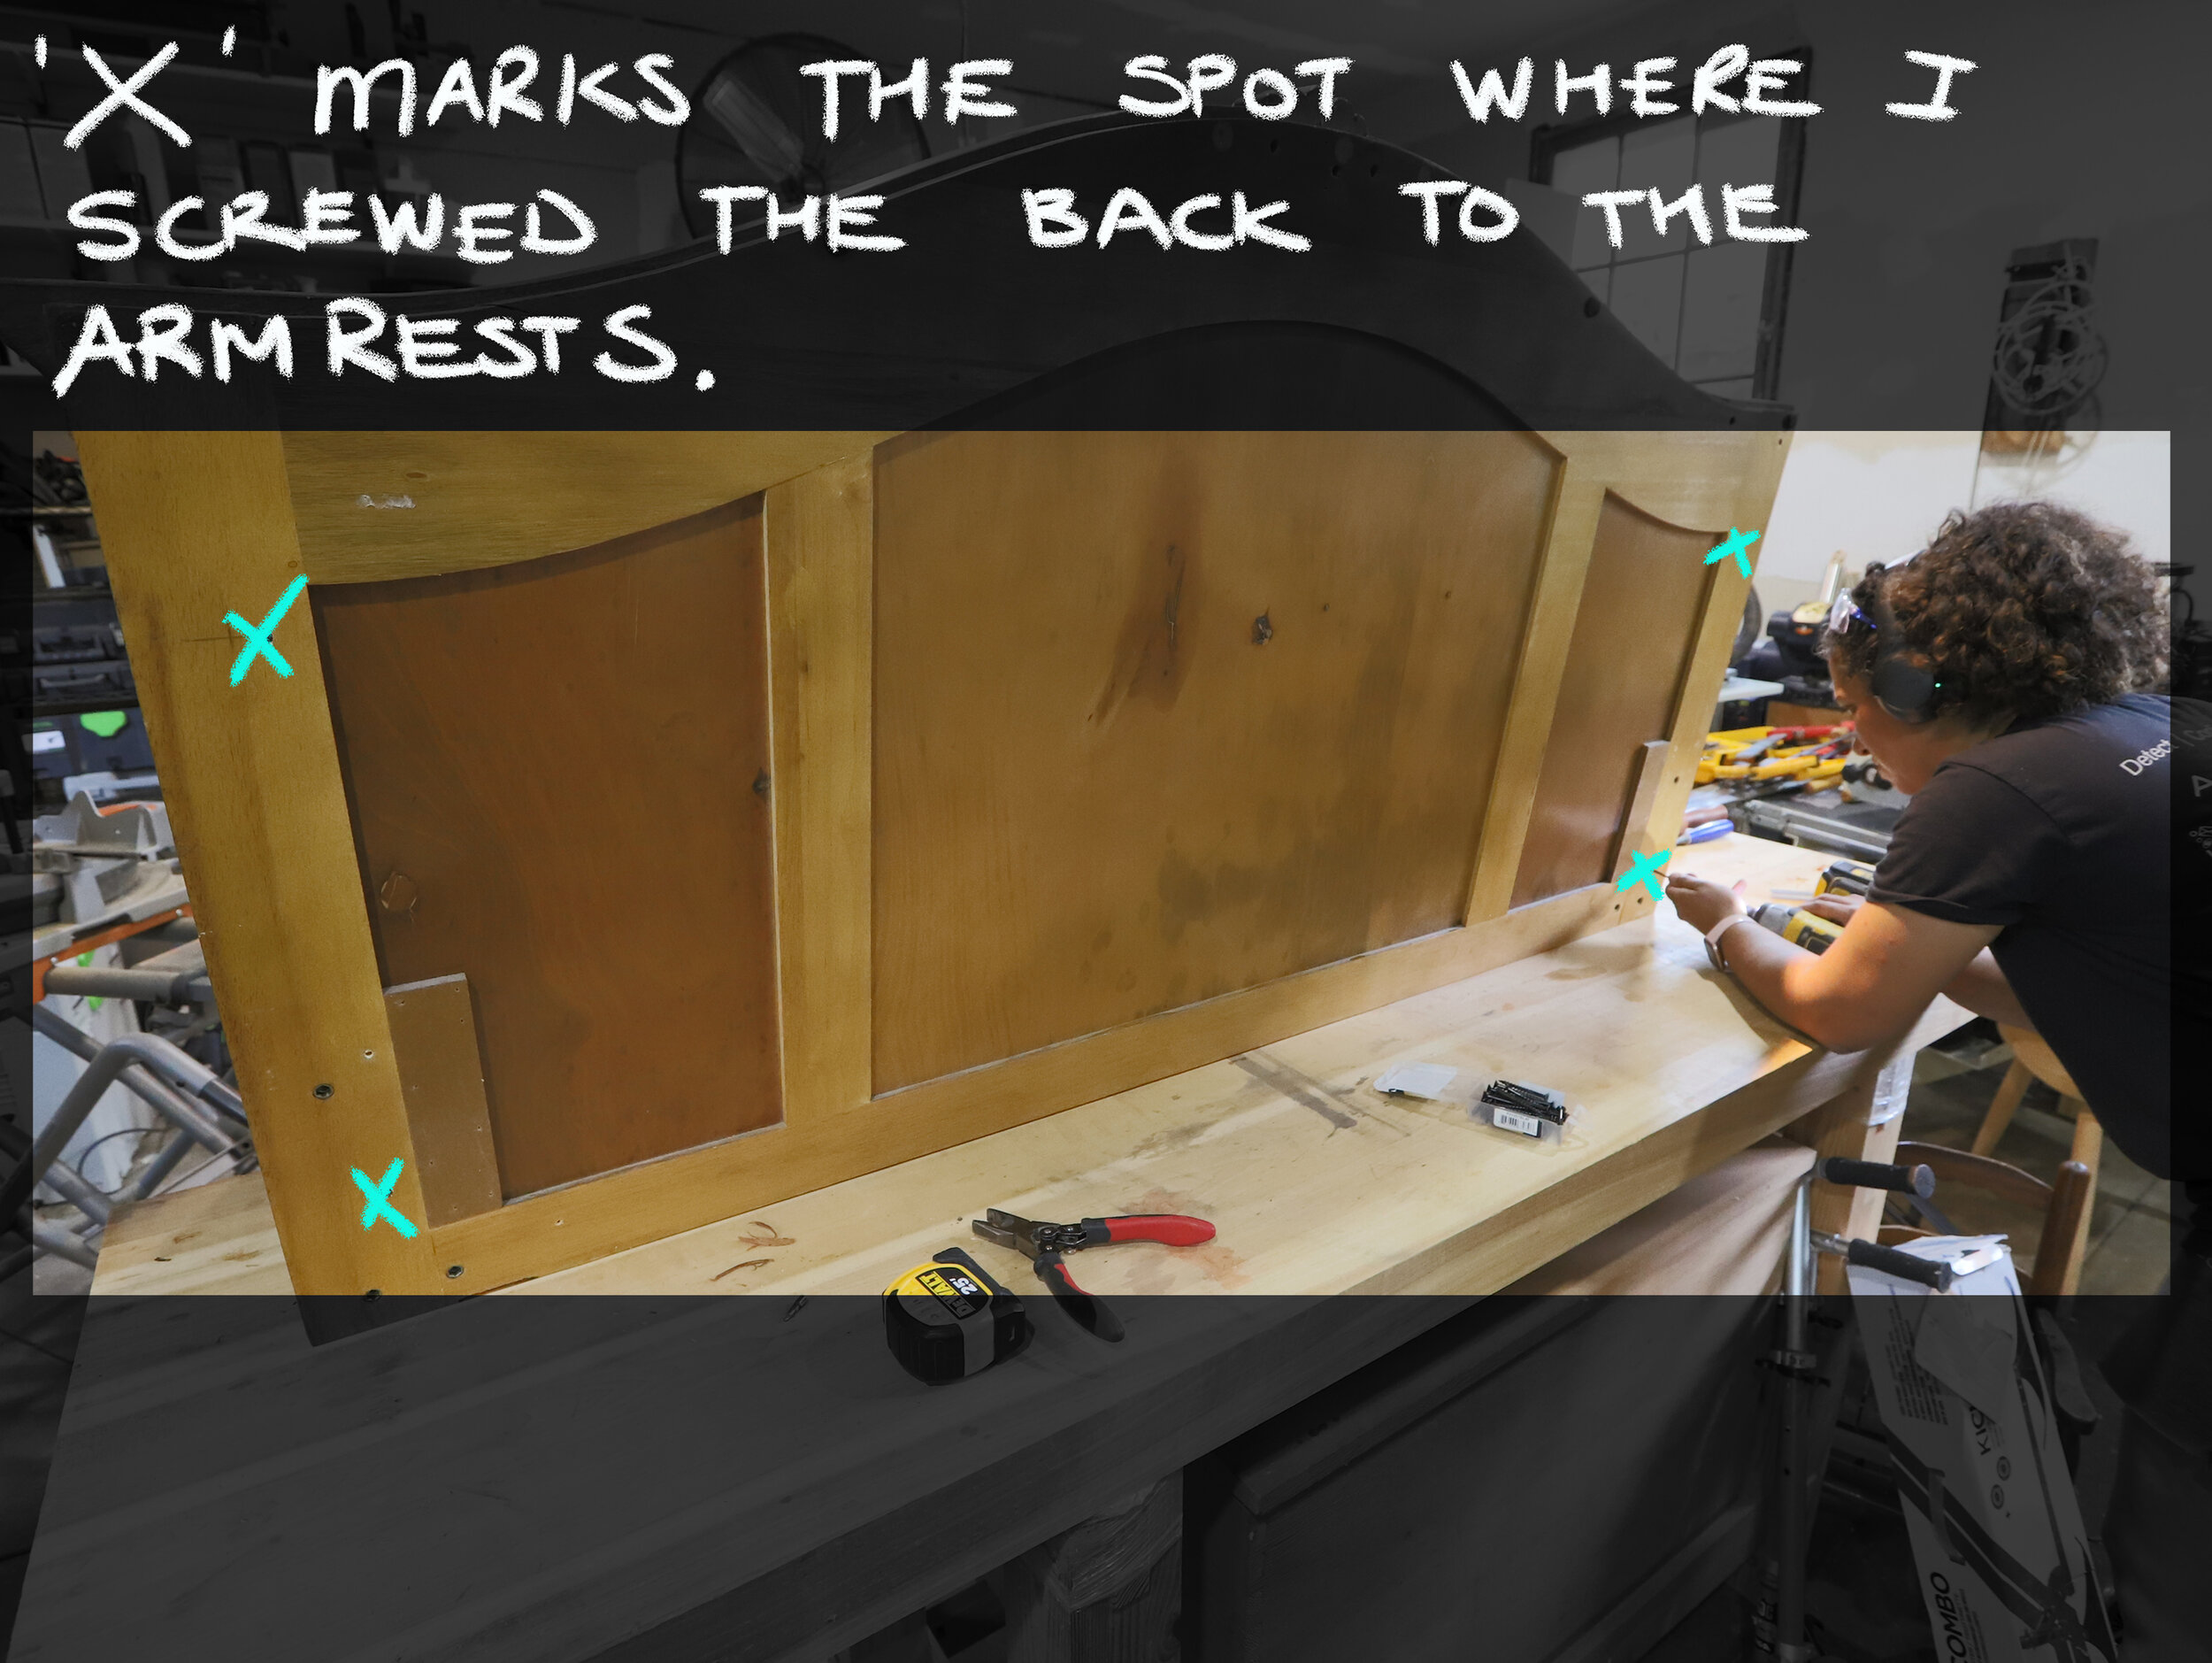
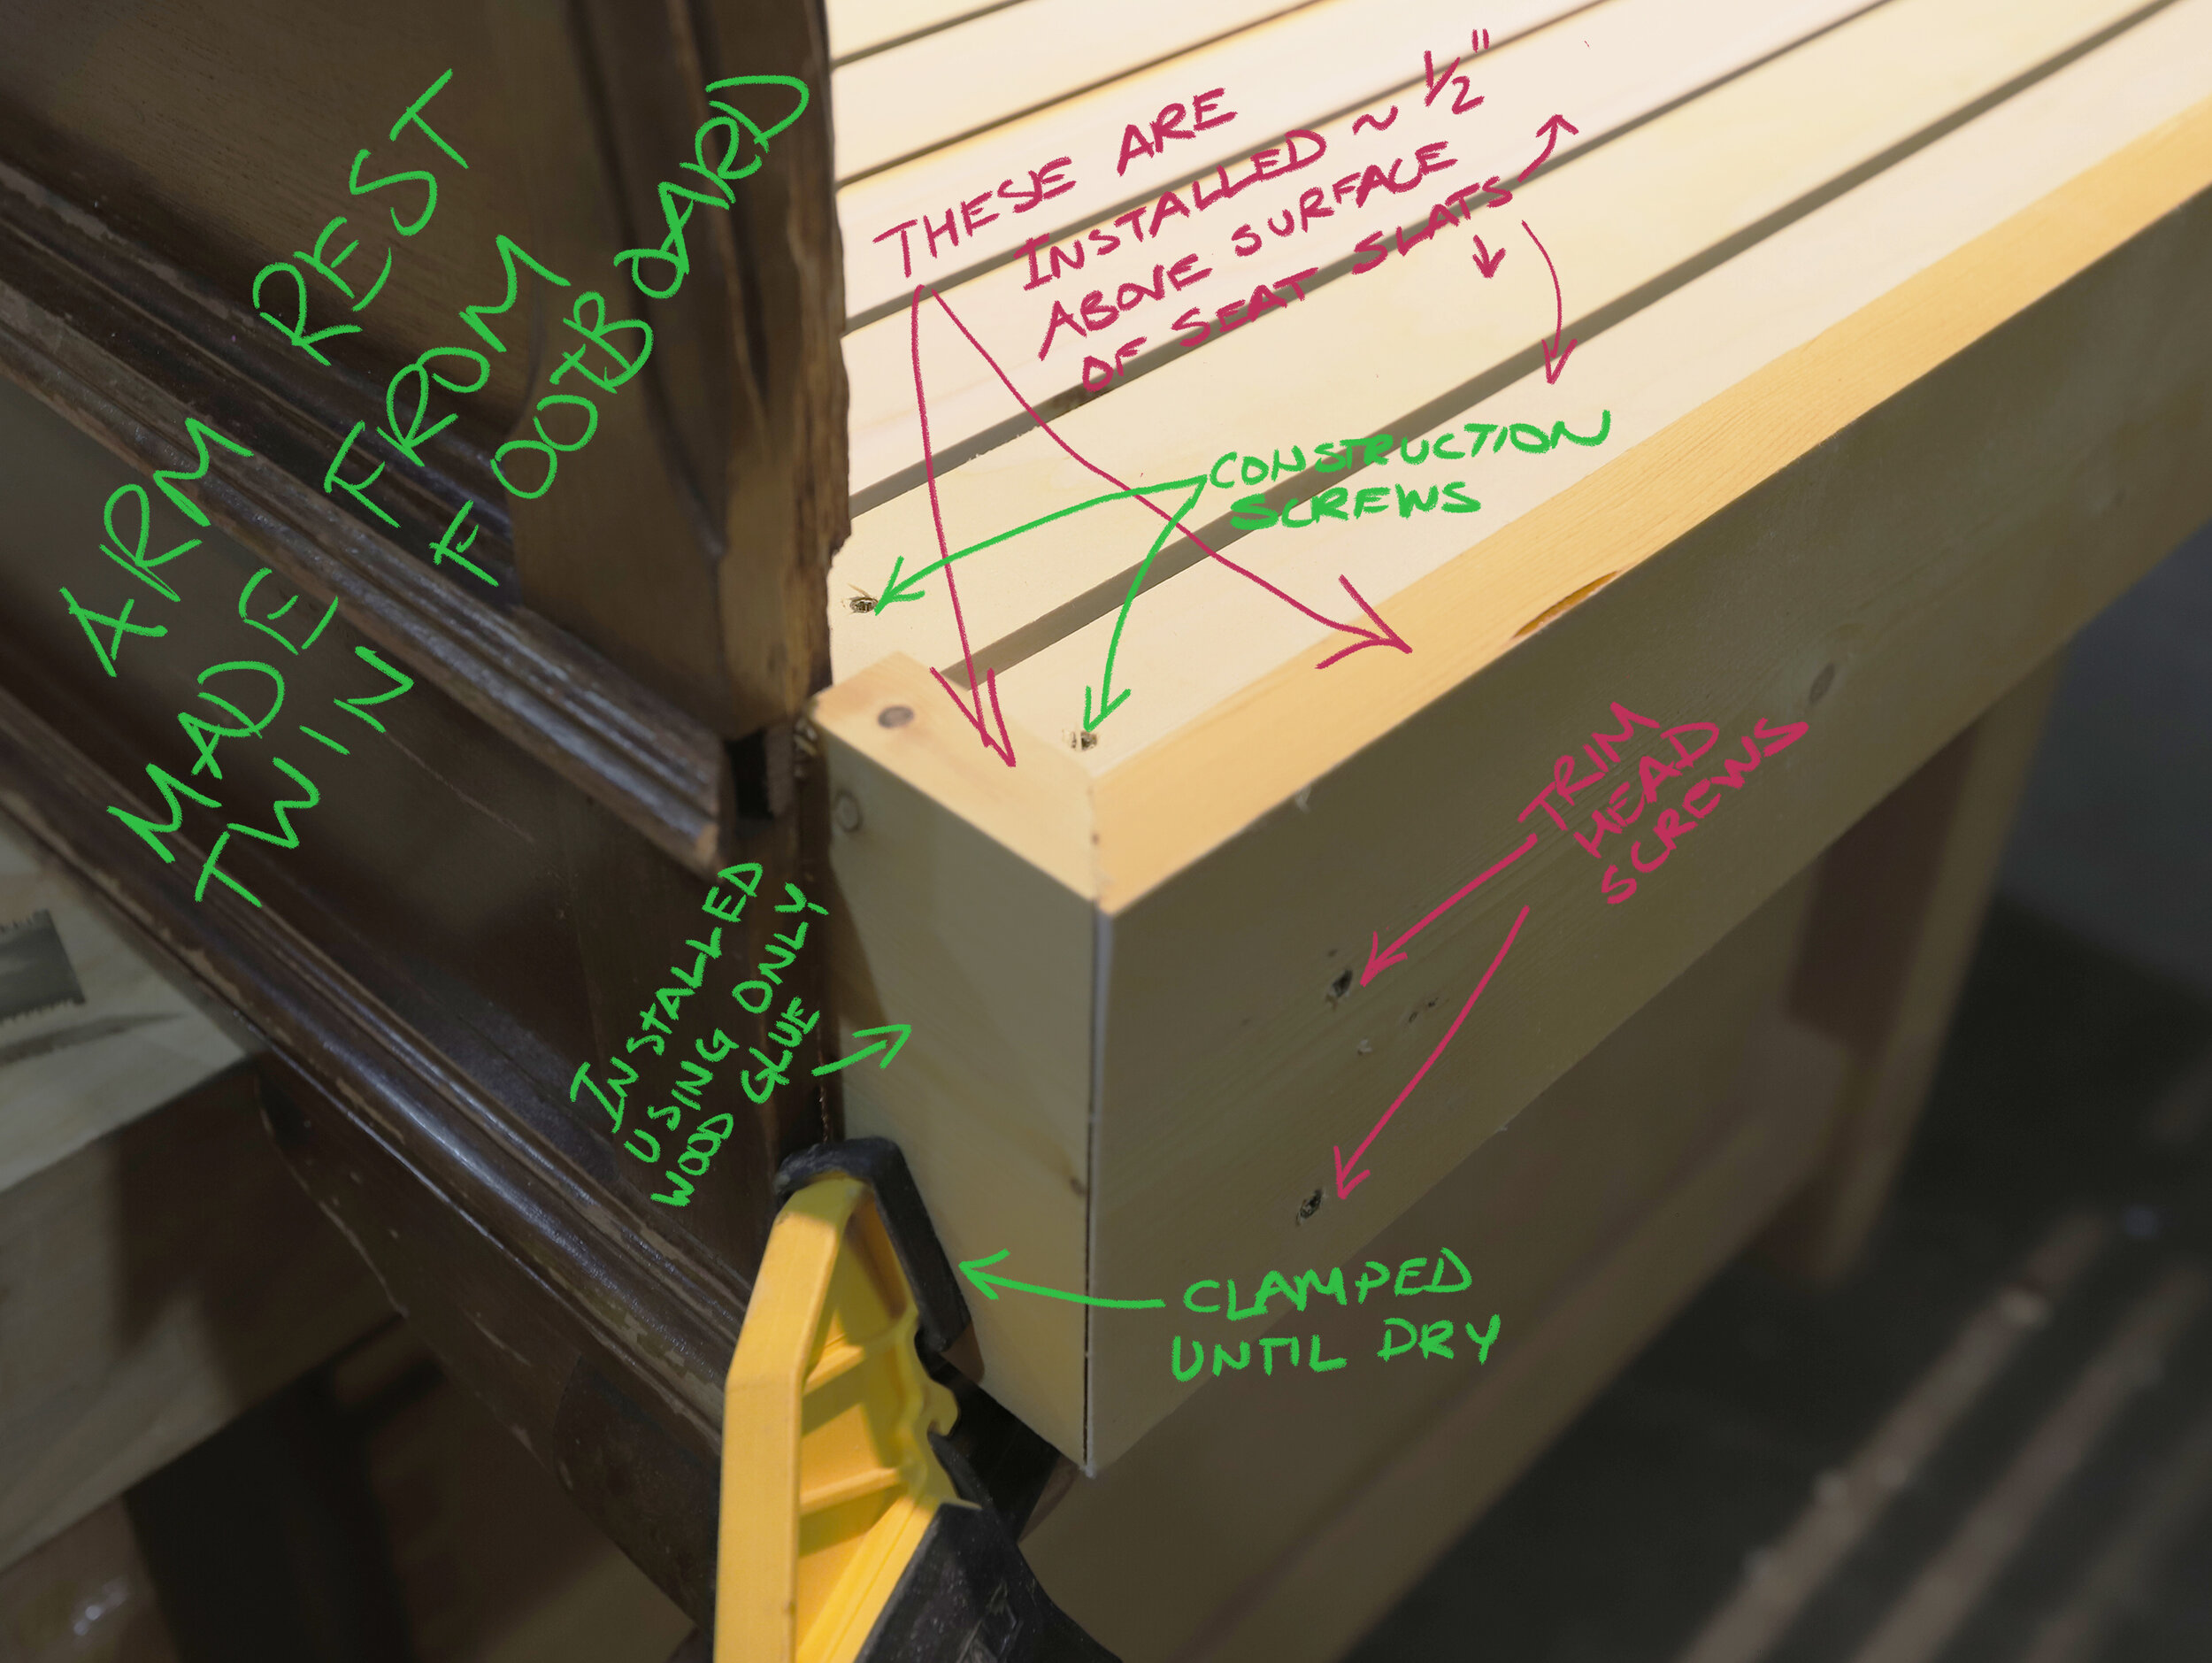
Using construction screws, I assembled the base frame then fastened it to the base of the headboard using clamps to hold it in place while I did so. The seat depth for this build is 19” since I wanted to be able to fit standard seat cushions I’d already purchased. Ideally, the depth should’ve been 21”. I never fail to have regrets with any project I build. Even if I’ve spent a great deal of time thinking through it. *le sigh*. Later, I’ll be using 3 lag screws to fully attach it since the swing will also be suspended from the top of the back. This headboard is the heaviest part of the swing and having its weight supported will help support the entire structure. The arms were also attached to the sides of the frame and then secured to the back (headboard) to add extra support.
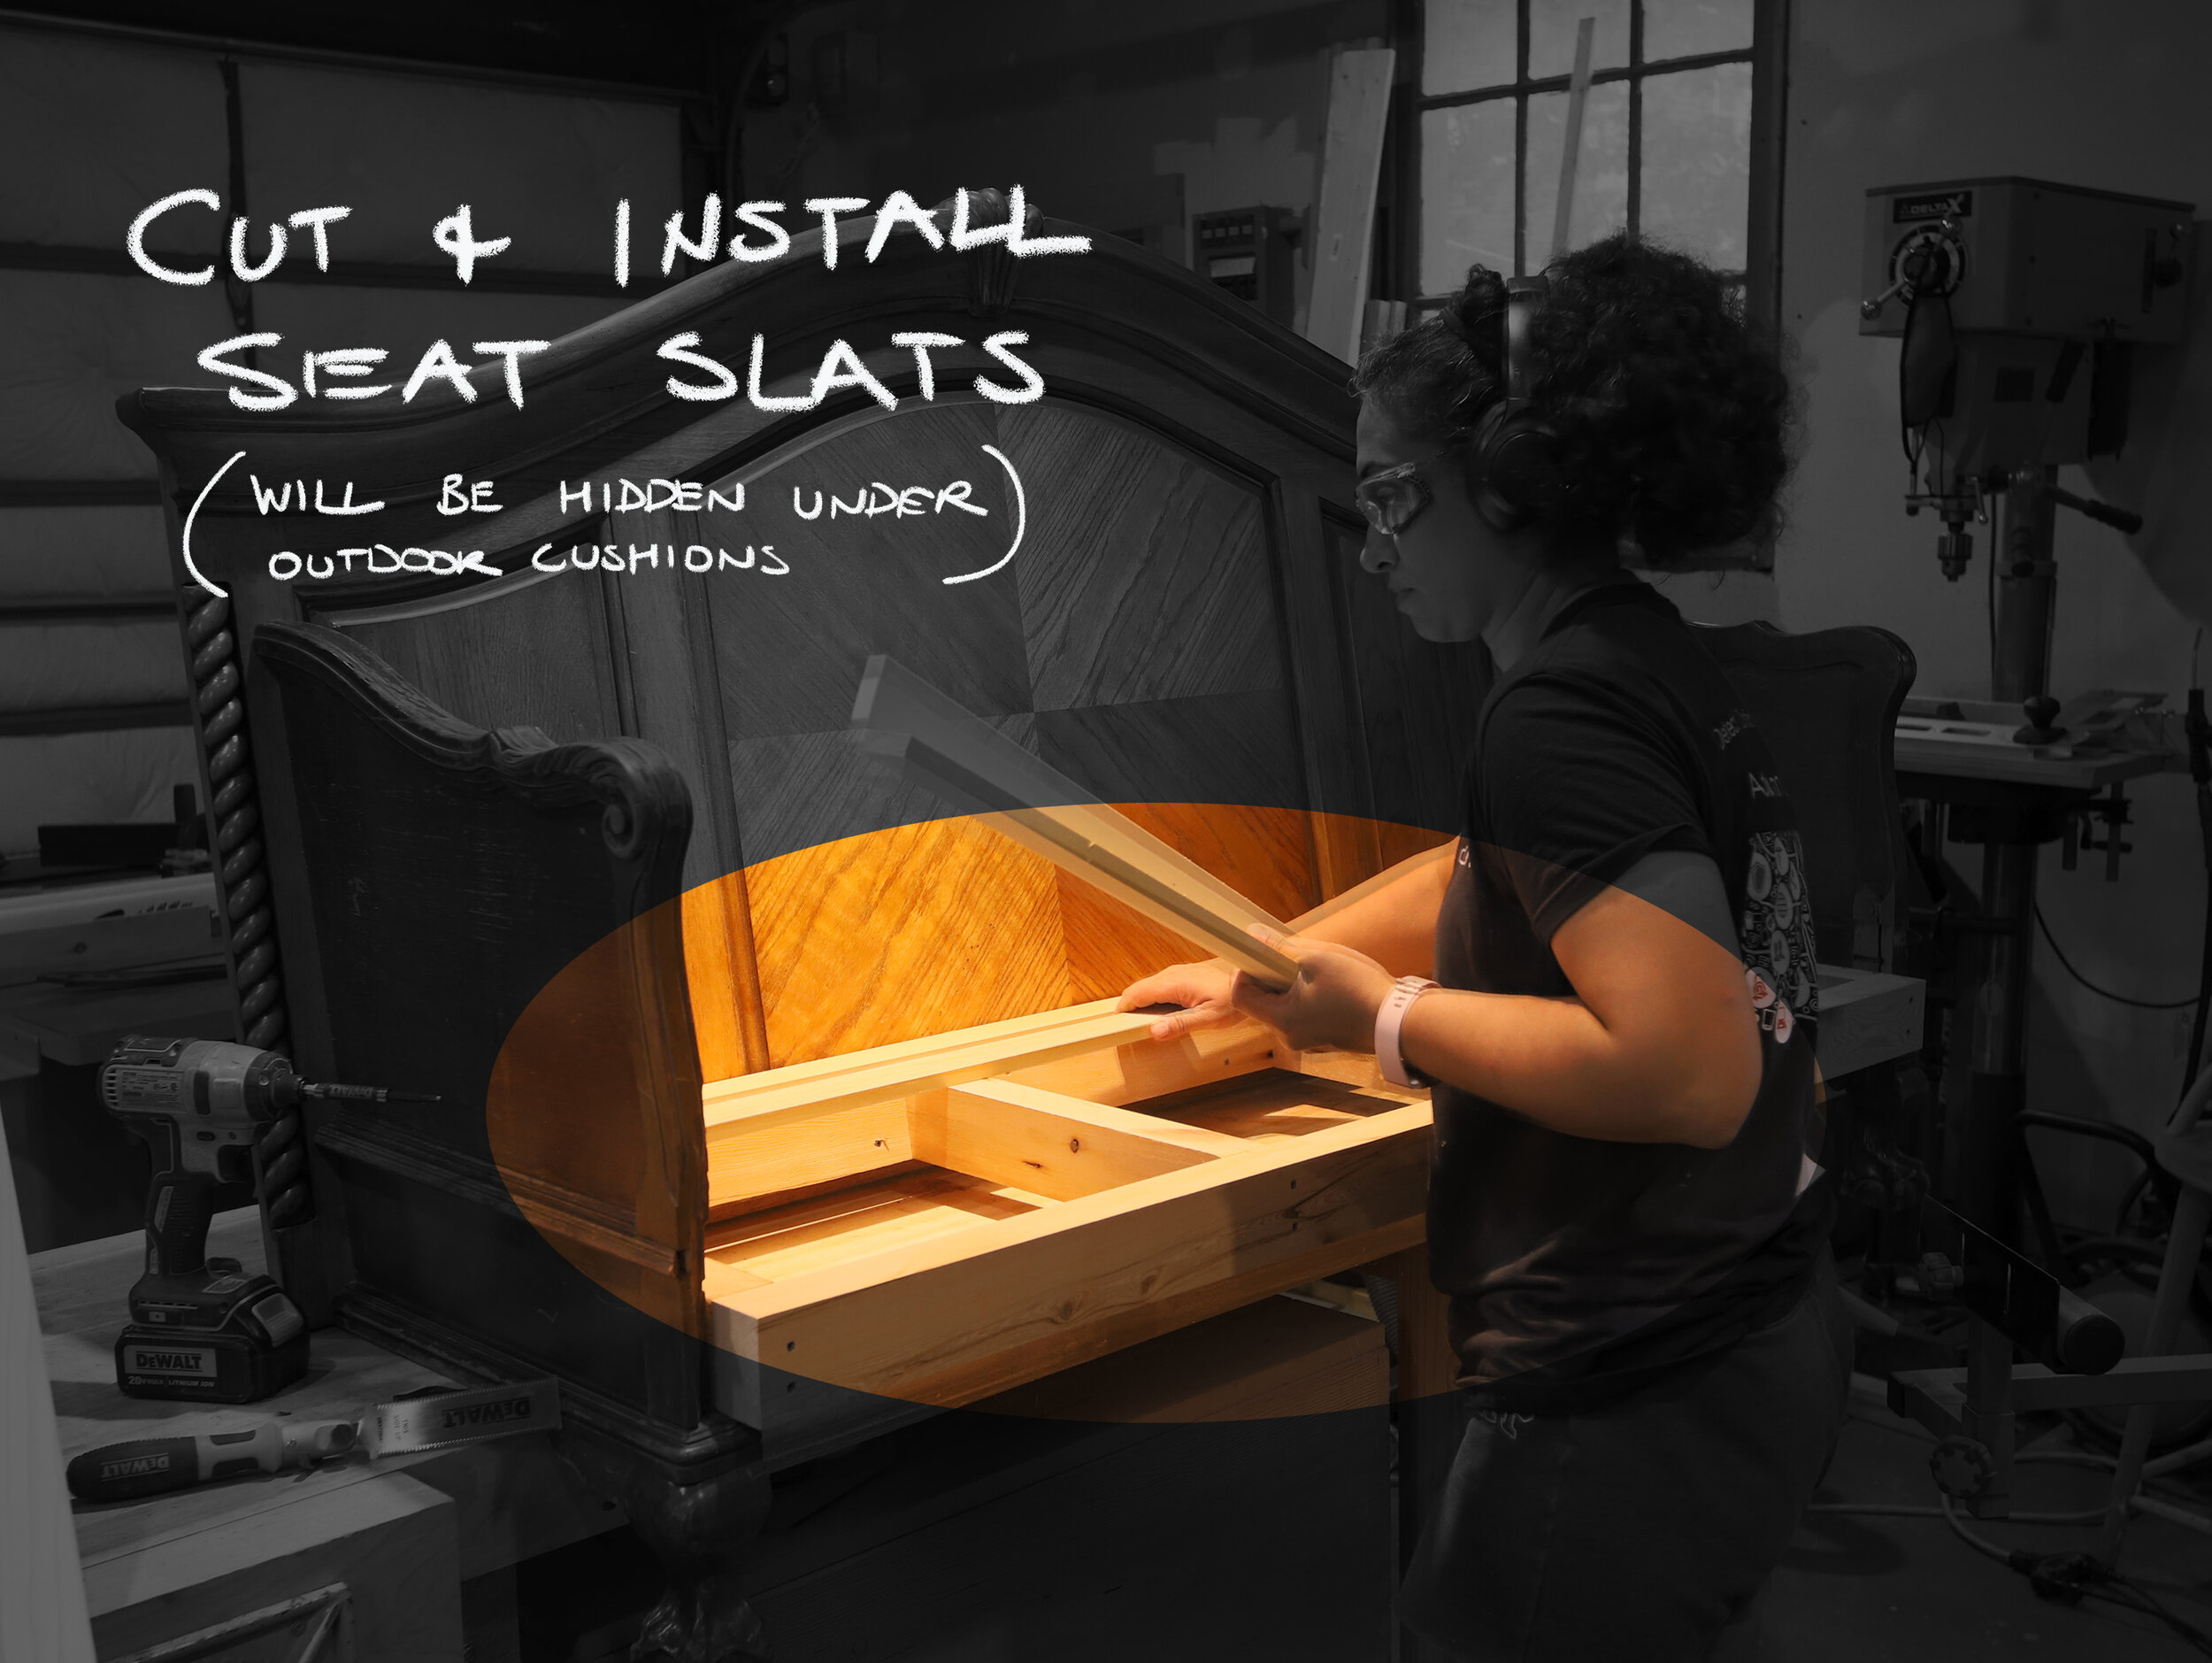
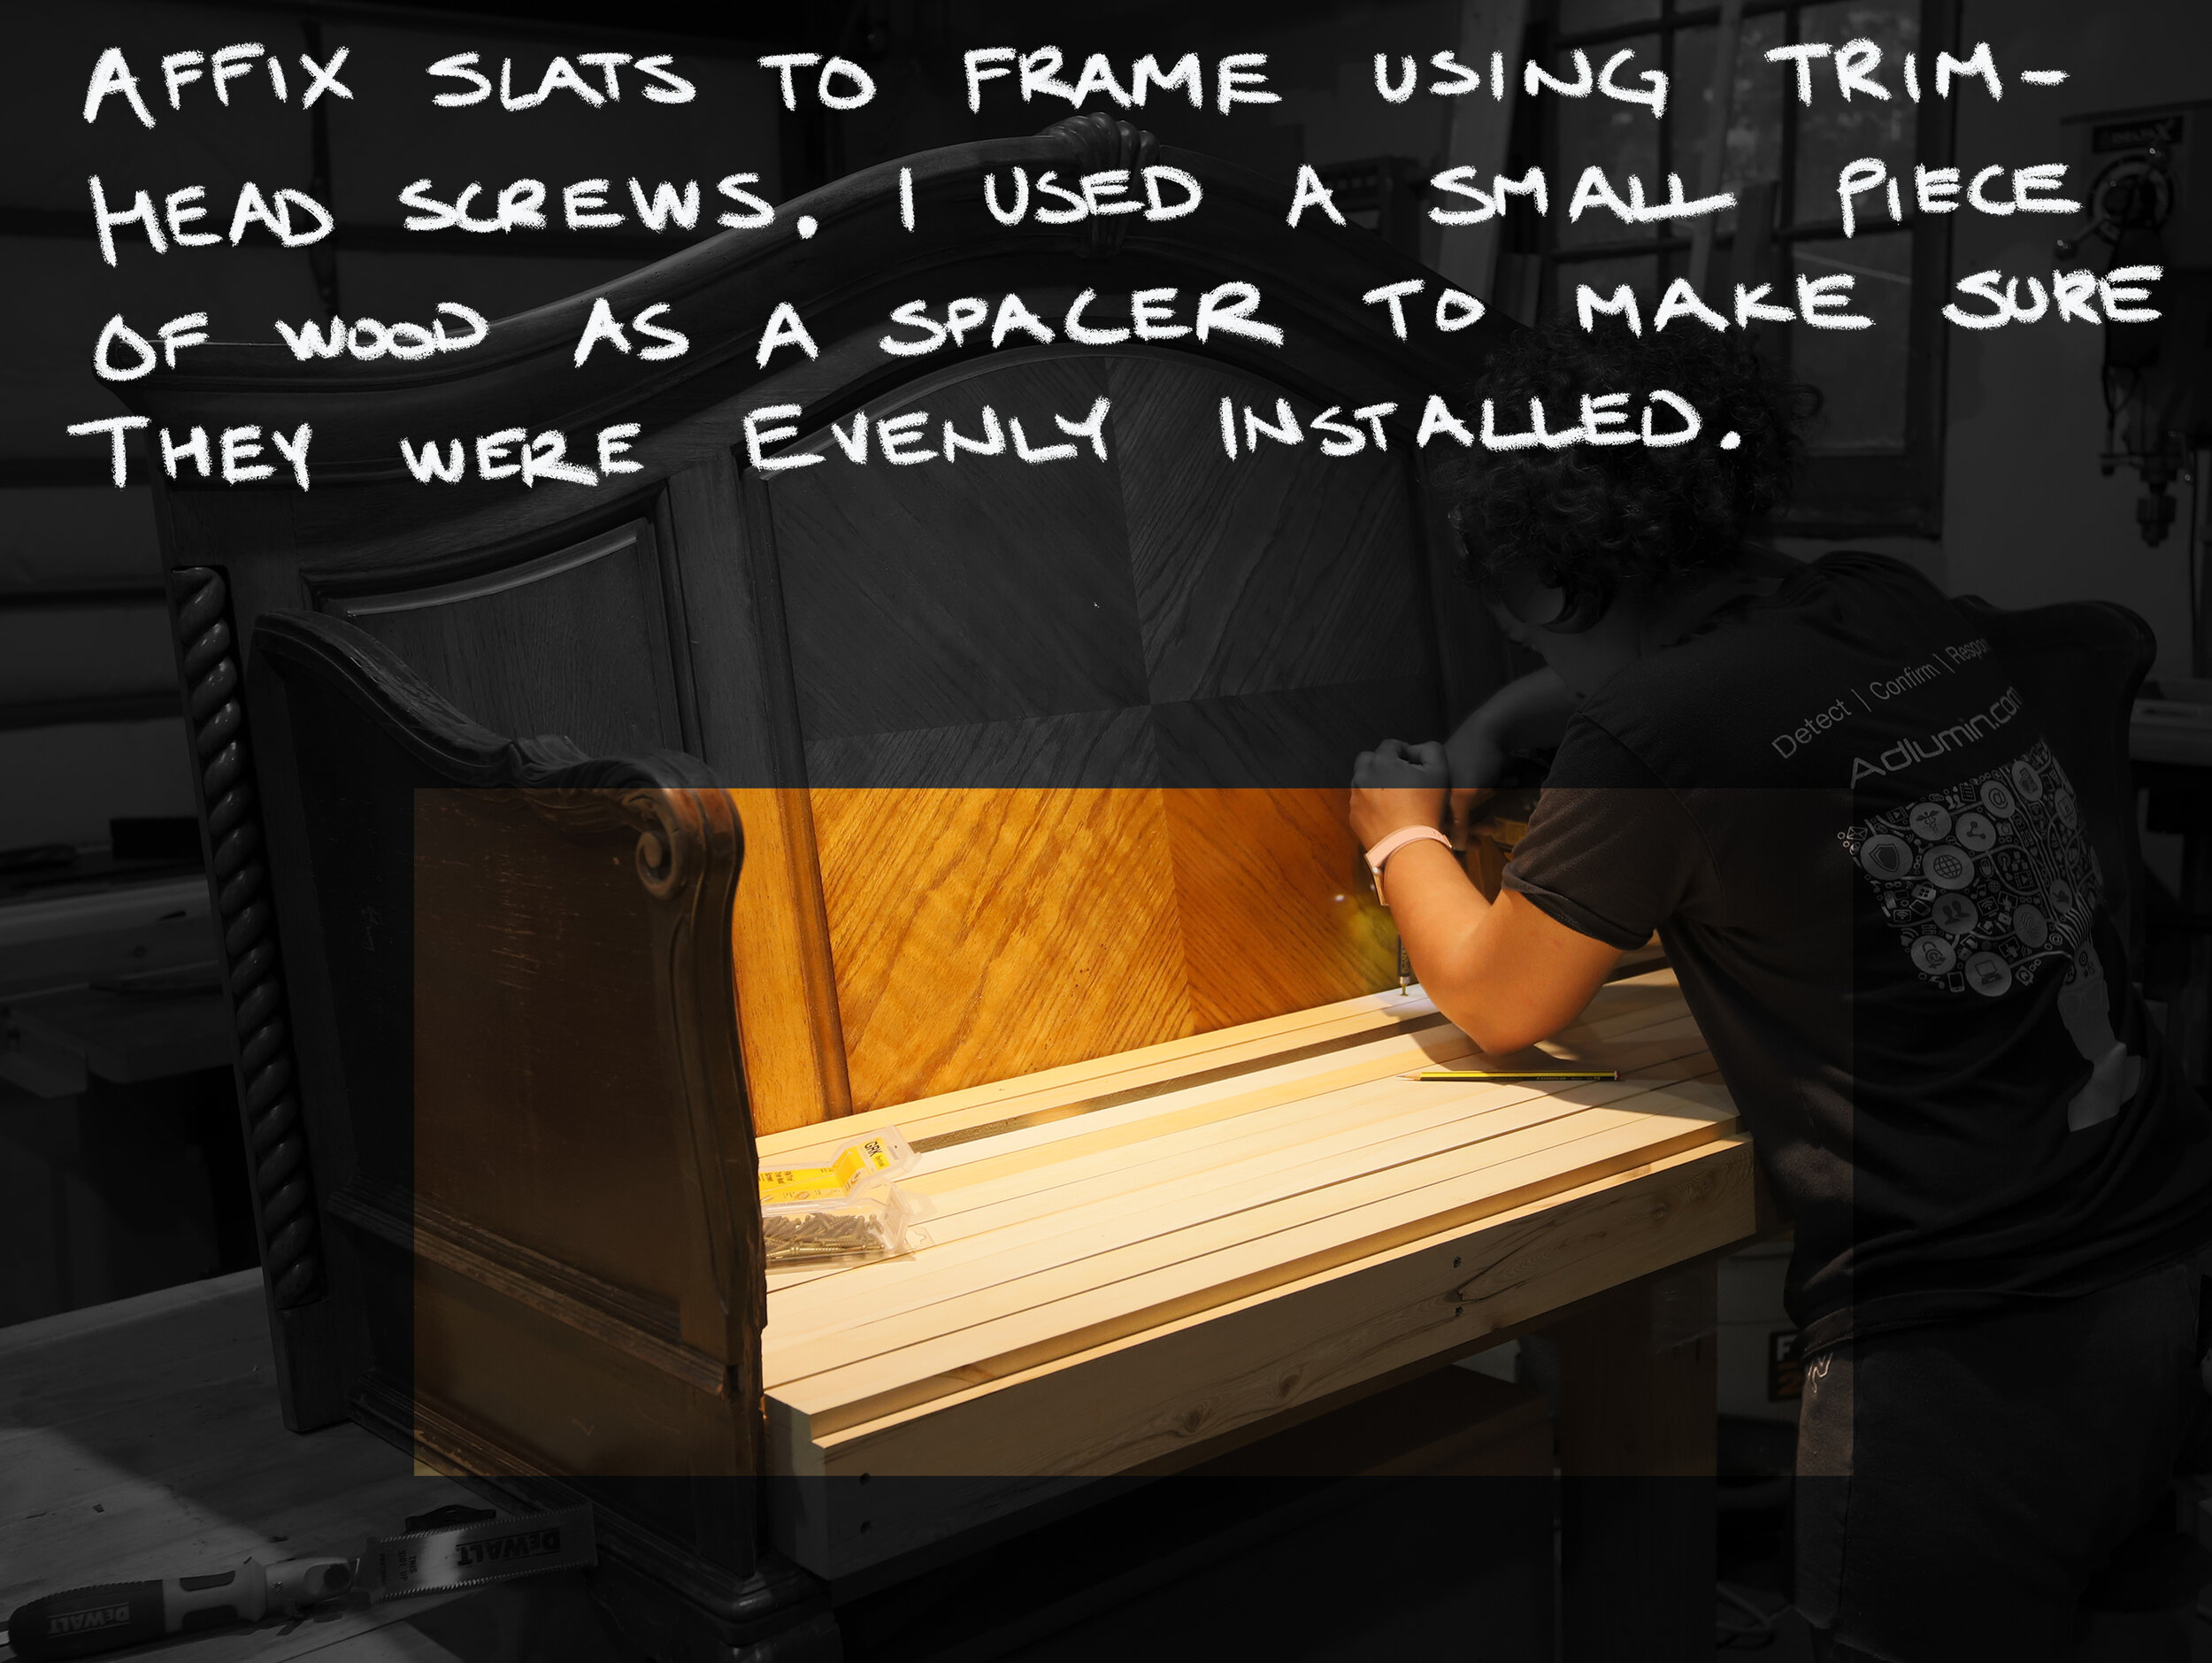
Final steps of building the whole seat involved installing the slats, where the cushions would be placed, and the front skirting, which gives it both a finished look and, when installed slightly above the seat level, prevents the cushions from sliding off when someone sits. All of these parts were installed using trim head screws.
Although the bulk of the work is done on this bench, I still need to add the hardware to hang the bench and apply the finish to the entire piece since the headboard and footboard are not made of the same finish and aren’t the same color. It’ll end up being a black lacquered finish to match the other furniture I procured for the space as well as the color of all the windows on the house itself. I will add all the info and instructions to this blog post when as soon as I’m done with those installs. I’ll announce the update on my Instagram page @byrneburymanor.
Below is a pictorial approach for this DIY step-by-step. No, I’m not yelling at you. All-caps is the only way my handwriting is legible. I’ll do better next time. Let me know how you like this way of explaining a build. I also only made one spelling mistake, which was more of my hand forgetting how to write an ‘H’, and I only contradicted myself once! It was late as I was editing these pictures and in the 11th picture I said the slats were attached using trim-head screws and in the 12th picture, I labeled them as construction screws. The correct answer is, they were attached with trim-head screws.
Now go back to the One Room Challenge Blog and check out what all the other talented people have cooking. Thursdays are my day off from everything and I take this time to admire everyone’s hard work. It gives me a boost to see all the spaces progressing.